Record Permissions in NAV 2016
One of the new super useful features in Microsoft Dynamics NAV 2016 is the capability to record table data permissions by simply going through the process in the application.
For those of you that have been implementing NAV/Navision when the classic client was around are probably familiar with this process since the classic client came with a client monitor which results you could turn into permissions quite easily. I did this all the time in the ‘old days’, but since the replacement of the classic client I have not found a good way of recording permissions until now. So, for me this feature brings me ‘back in business’ when it comes to setting up permissions in a proper way.
In this blog post I will not only describe the new functionality but also the way I think it should be applied (basically how I did for years using the classic client). The overall concept is to create a permission set (previously called role) for each process within the business and then use the corresponding documentation to record the permissions.
Most (almost all) Dynamics NAV implementations involves documenting the new processes and procedures that the new ERP system brings. Typically this is done by creating work instructions for each process (at least that is my experience). The work instructions are sometime very simple and other times very detailed, similar documents could also go under the term standard operating procedures (SOP) or even test scripts. To me they are kind of the same with some slight variations in the content and details.
Using documentation like that to setup the permission sets makes a lot of sense. You then by default document what you can do with each permission set and you can delegate the work of setting up the permissions to the key users that are preparing the work instructions. And if you are ever subject to a software audit you can just show the work instructions that correspond to the permission sets to describe what each user can do.
Below is an example of how I think this should be done.
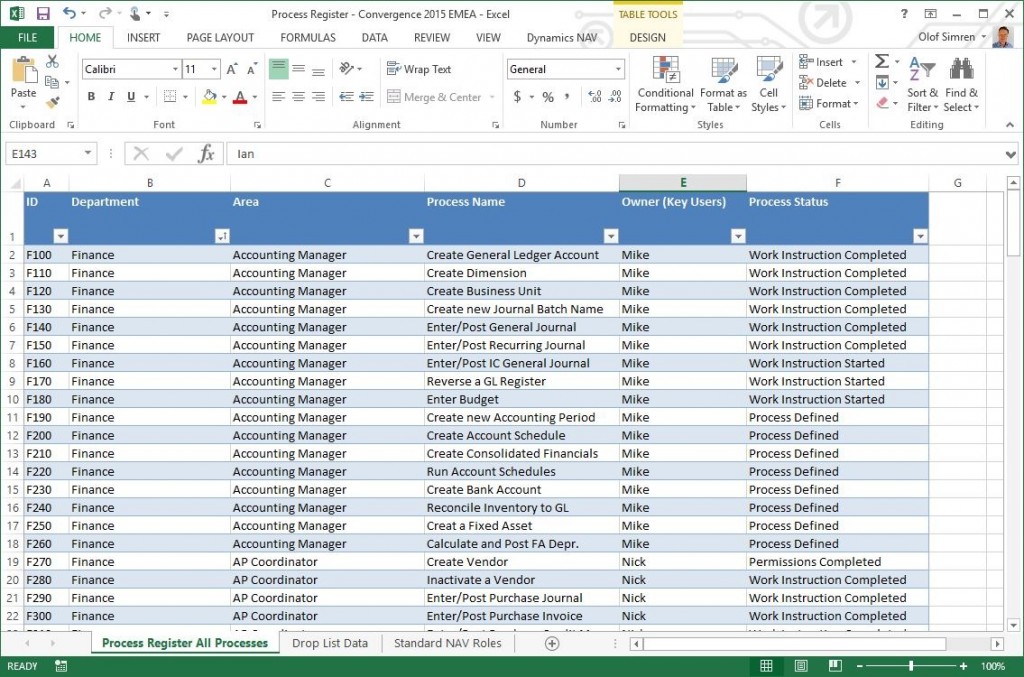
You start with the list of processes that you have defined as part of the general Dynamics NAV implementation. It can for example look like below where you have an Excel spreadsheet with a list of processes together with an ID, responsible key user and a status of the process.
Each of the key users then create work instructions for their corresponding areas (this could also be a task for the consultants helping with the implementation). A work instruction is in my mind a word document with some screen shots that described how to do a process (like creating a vendor) in Dynamics NAV.
Now to ‘transform’ the process register and work instructions above to corresponding permission sets in Dynamics NAV you first need to create the permission sets and then for each of them record the permissions by going through the corresponding work instruction.
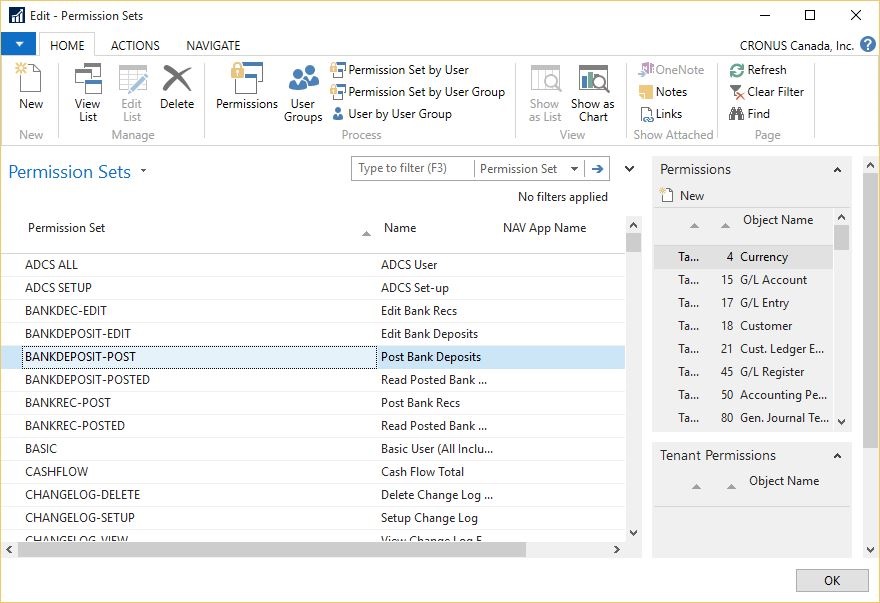
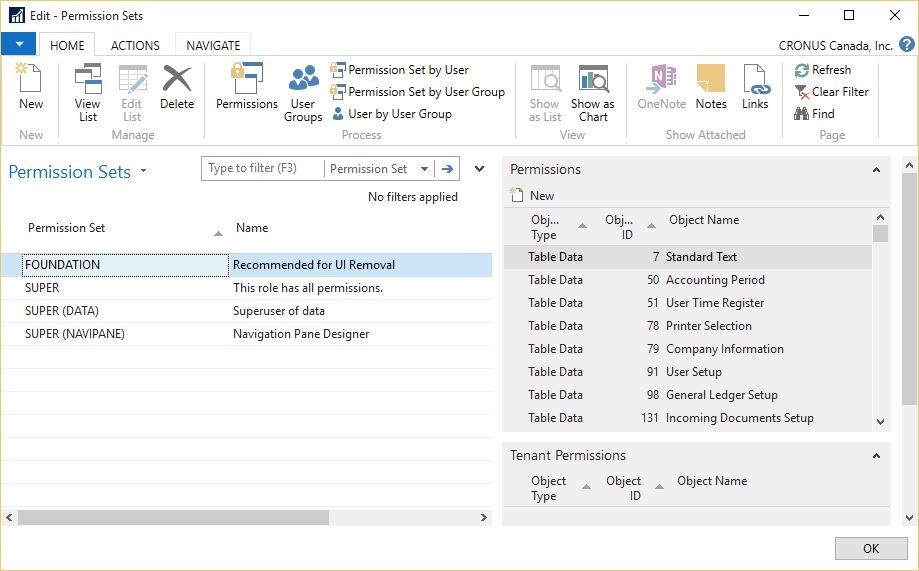
Below are how the standard NAV permission sets looks like. A lot of the time the first approach would be to use those and then tweak them to fit your specific need. My experience with this is that it works but you end up with permission sets you don’t really know what they include. So, my approach is to first just delete them all except for the SUPER ones and the FOUNDATION set (which is the old ALL role).
You then end up with permission sets as below.
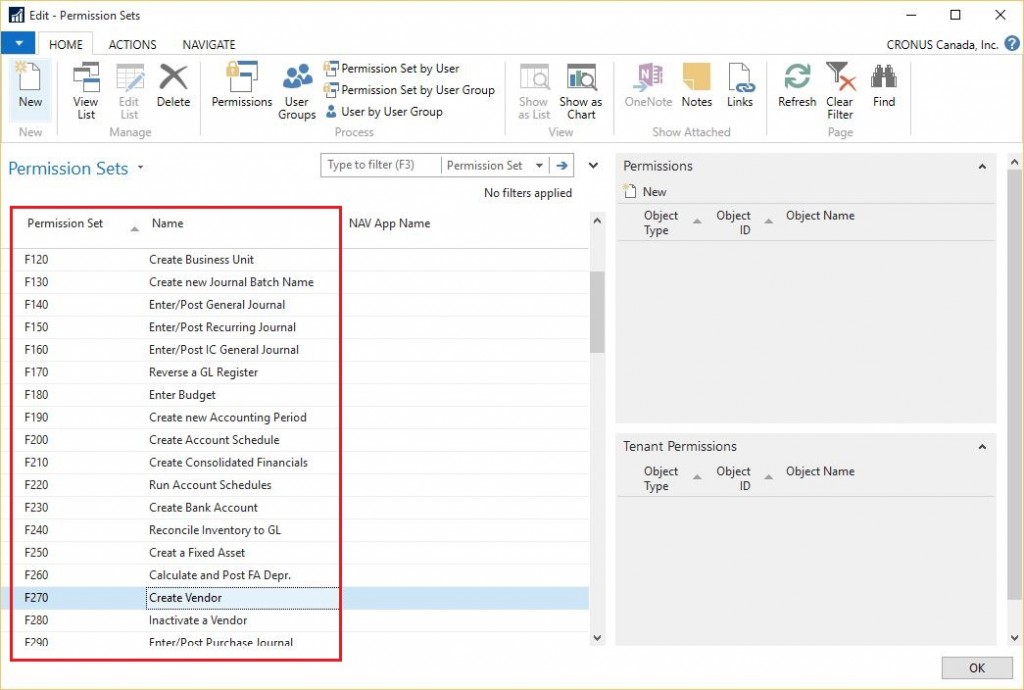
Then you copy/paste your processes from the process register in Excel into Dynamics NAV as permission sets.
For each of the permissions sets you then need to define the permissions. This could at first glance seem to be a lot of work, but with the new way of recording the permissions it is actually quite quick (I know because I used to do this when the classic client was around). The task can also be divided between the key users, each of them doing the recording for the processes they have defined and described (during the test phase using super user permissions).
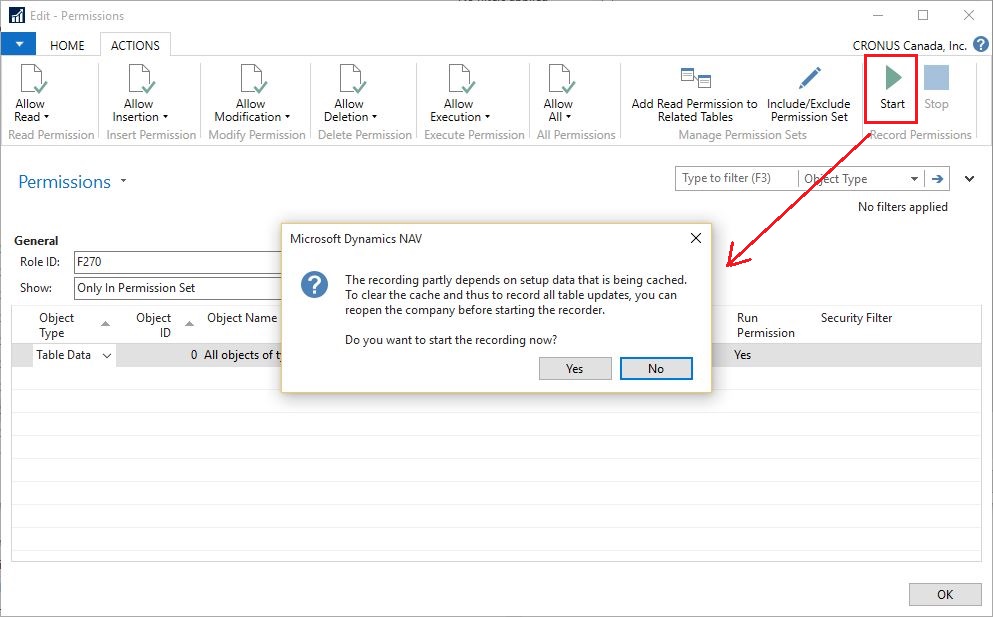
The recording is done by selecting start in the record permission group in the ribbon of the permissions page, and then select yes. Makes sure you read the message that appears about cache, you basically need to close and reopen NAV or the company to clear the cache to be on the safe side.
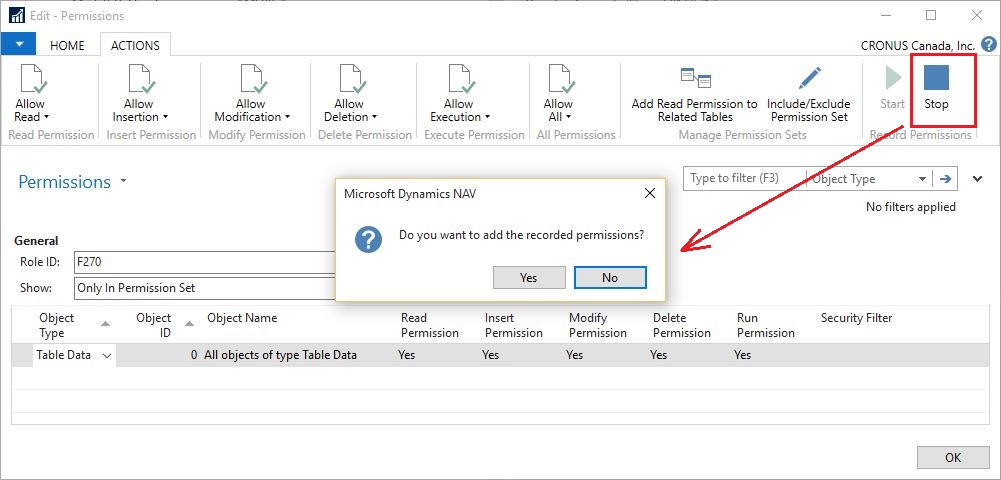
You then just leave the permission page alone and go directly to the process you are about to record permissions for. When you are going through the process, make sure to cover everything that needs to be done and if you insert a record make sure to also modify and delete it if that should be part of the permissions. When you done you simply select stop in the header of the permissions and then yes in the dialog that appears.
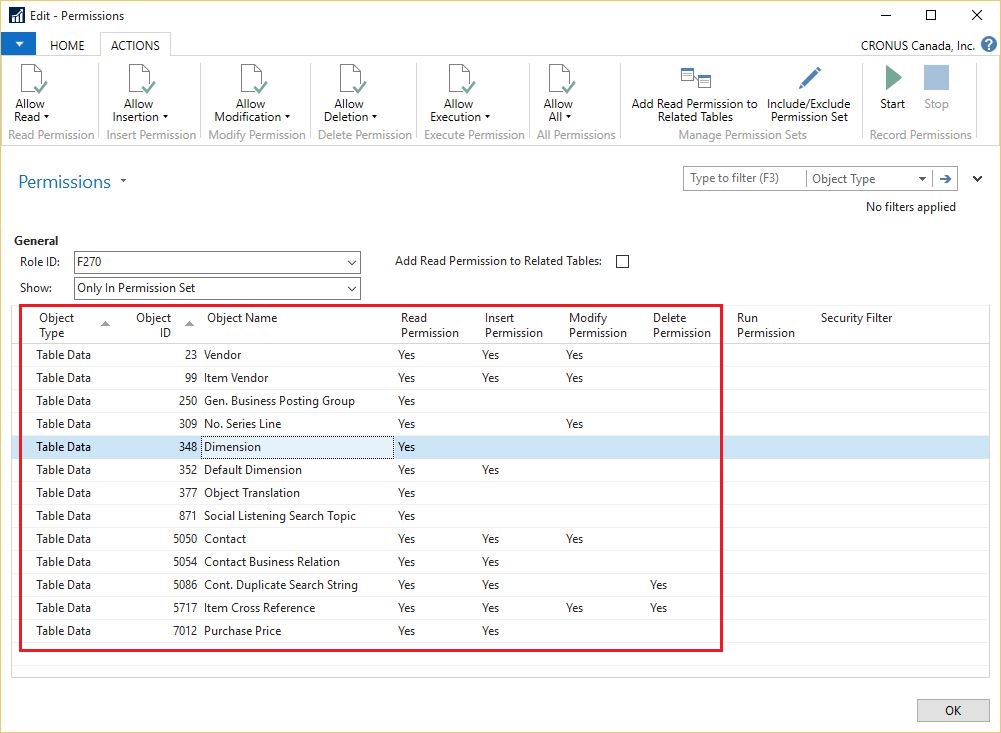
The tables that where involved in the process you did are now added to the permission set, nice! 🙂
Only table data permissions and no indirect permissions are captured (indirect changes becomes yes in the permissions). Only capturing the table data permissions is in line with how the standard permission sets are done as will, the FOUNDATION permission set gives the user full access to all the other object types and then you basically just limit what they can do by setting the table data permissions. My experience is that this works fine. Not capturing indirect permissions is a small drawback, but not something to be worried about.
When you have recorded the permissions it makes sense to review it a bit, for example if you have inserted a record by forgot to delete it you can just add the delete permission here (same with modify). You can also just start the recorder again to add to an existing permission set.
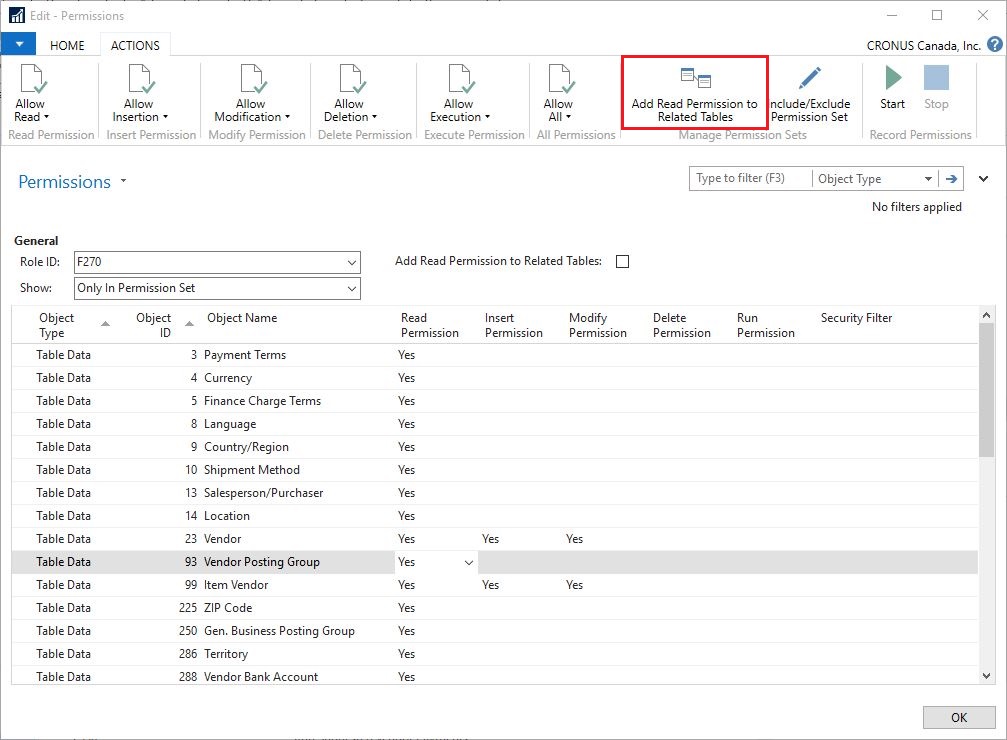
Another nice feature on the permission page is the ability to add read permissions to all related tables. For example if you are recording a permission set for creating a new vendor then this function will make sure you also have read permissions to the related tables so that you can make lookups in fields like the payment method code, posting groups, currencies, etc.. Sweet! 🙂
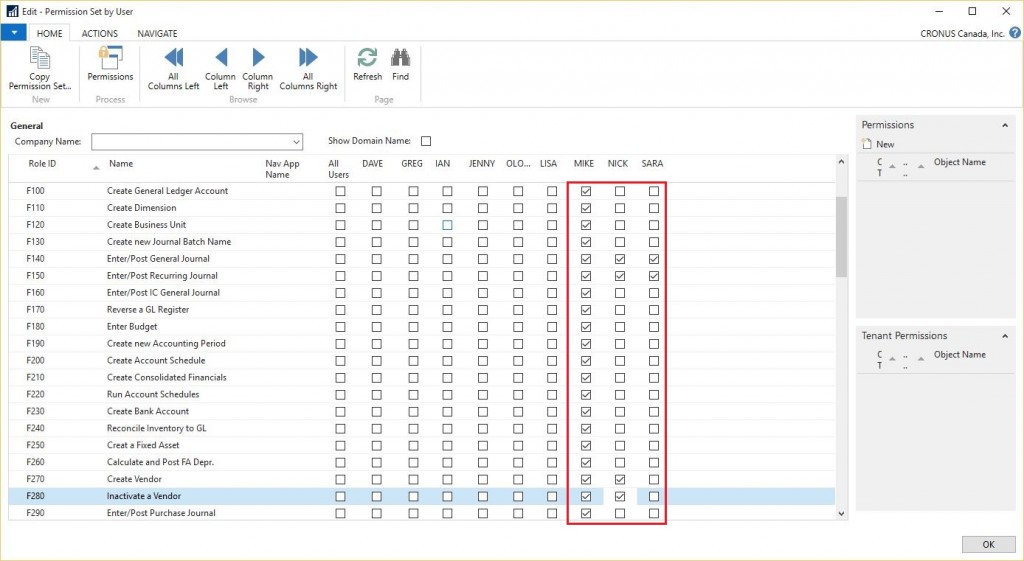
To finish the permissions setup you obviously need to assign the permission sets to users. You do this in the permissions set by user page by simply checking the permission sets that should be granted to the individual users.
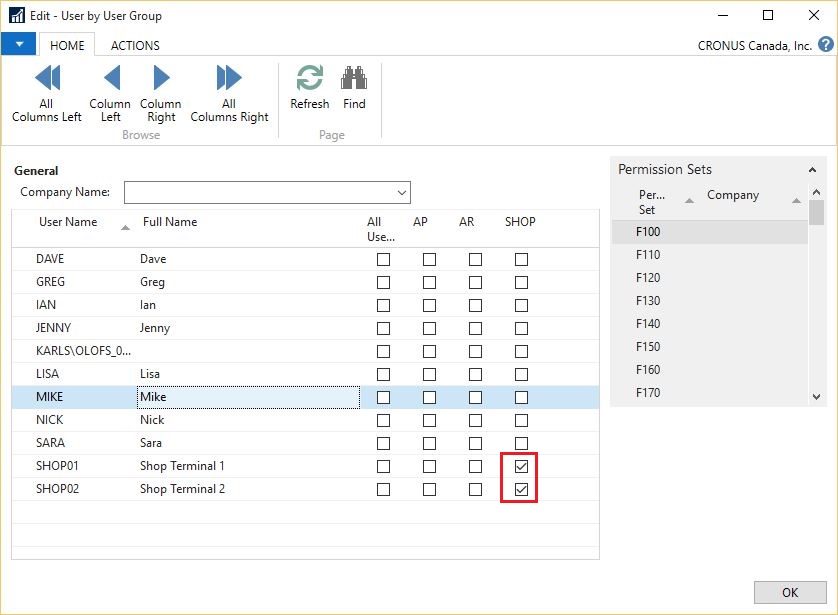
Permission sets can also be assigned to groups of users. This is useful of you have multiple people or logins that should have the same permissions. To do this you first assign the users into groups using the users by user group page. In the below example I have two shop floor terminal logins that are grouped into a SHOP group.
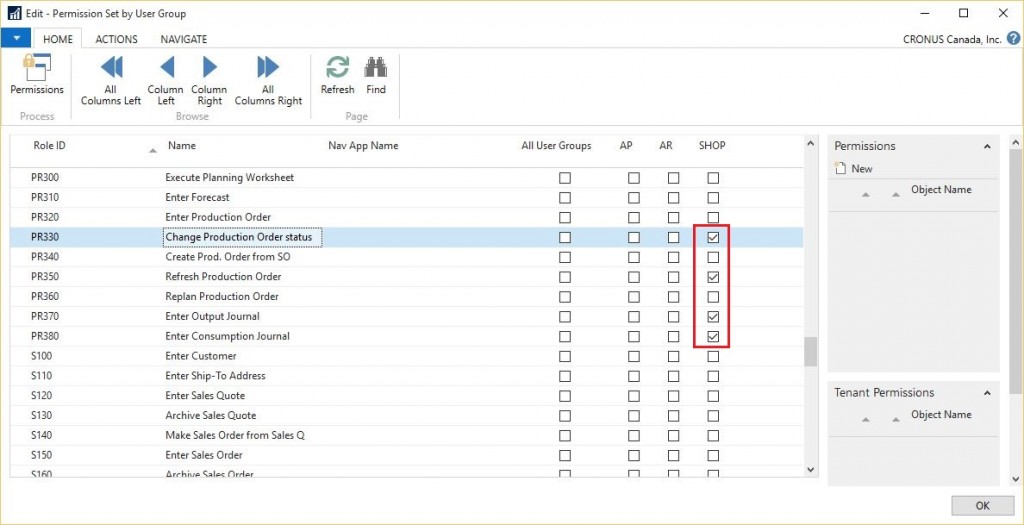
Then you set the permission sets per group.
That’s it! Super simple! 🙂
Remember to test the permission sets (use the work instructions to test it). When testing it is useful to know that you can log in as a different windows user without having to log out and in of windows (so you can have two clients open at the same time), you can do it this way; Run Dynamics NAV as Different User.
I hope the above gave you an idea of how you can structure and setup the permissions in Microsoft Dynamics NAV. As always, feel free to comment below or share this post.
Also note that I will be at Convergence 2015 EMEA in the end of this month. I will be at the KCP Dynamics booth, talking about this and other Dynamics NAV related things. If you are going to convergence, please drop by booth number 3 where the KCP Dynamics team is and say hi.
Cheers! 🙂
9 Comments
Leave your reply.