Equisys ZetaDocs with Tectura Document Configurator
How do I get the Equisys ZetaDocs add-on to work with the Tectura Document Configurator? There are some tricks to know, but once you know them it is actually easier then making it work with the standard Microsoft Dynamics NAV reports (and less object changes required).
ZetaDocs is a document management add-on that among other things provides functionality to e-mail and apply templates (stationery and attachments) to documents printed from Dynamics NAV.
The Document Configurator is an add-on that controls the content and layout of the documents through a configuration in Dynamics NAV (and therefor eliminates the hassle of Visual Studio and RDLC programming).
Both of them are top Dynamics NAV add-ons, getting them to work together provides a great solution for printing and delivering document out of Dynamics NAV.
Here is how to do it, we use a sales invoice as an example.
First we need to modify the report that prints the sales invoice. The Document Configurator prints all documents with the same format using the same report. If you are printing sales invoices in the portrait letter format then it uses report ‘12032029 – DC – Letter Portrait’ to render the print.
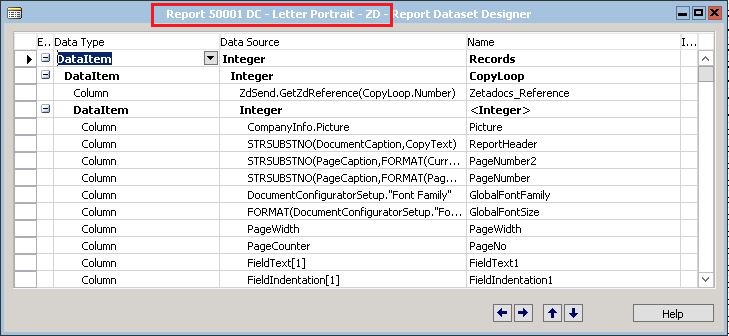
Open the report in design mode and save it as a new report (I saved it as ‘50001 – DC – Letter Portrait – ZD’ in this example).
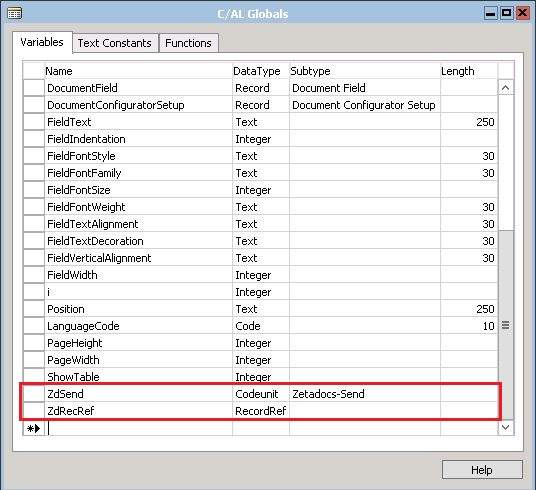
Add the two global variables according to below.
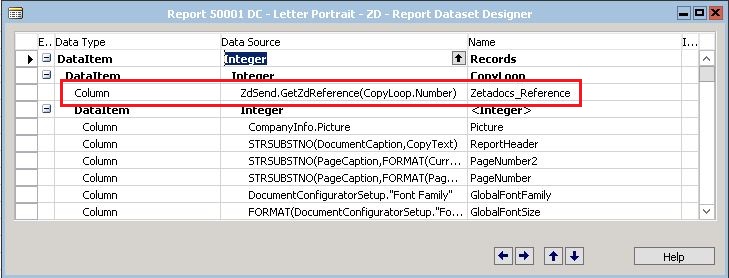
Add the Zetadocs_Reference column according to below.
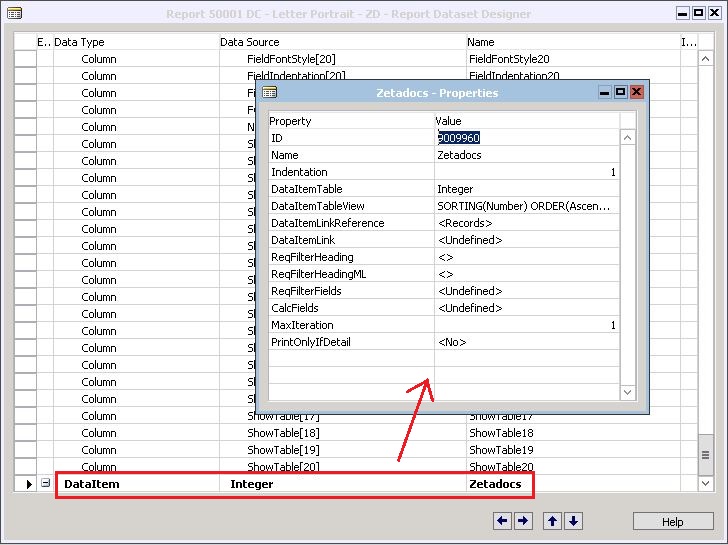
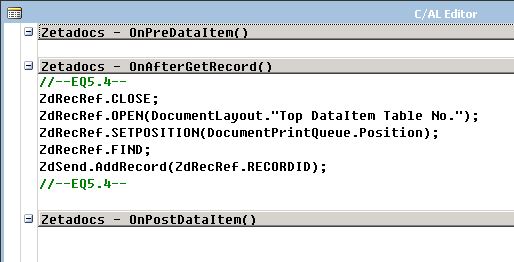
Add a Zetadocs DataItem in the end of the dataset according to below, note the properties.
The above added ZetaDocs DataItem should have the below C/AL code, make all the variables local. Note that this is slightly changed compared to the code in the standard ZetaDocs reports, the main difference is that the RecRef comes from the document print queue where it is defined as a table number and a position.
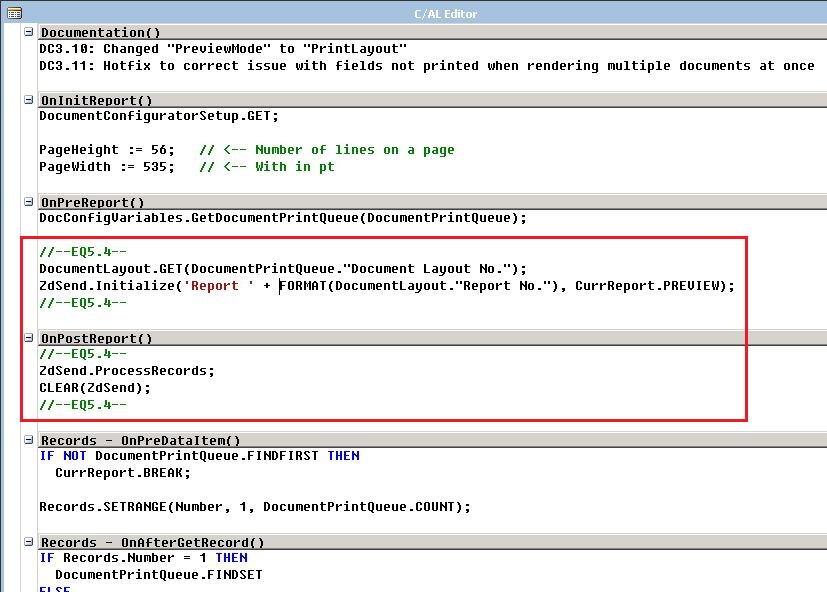
Then add the following code in the OnPreReport and OnPostReport. Note that is is also slightly changed compared to the code in the standard ZetaDocs reports, the main difference is that the report id comes from the document layout record.
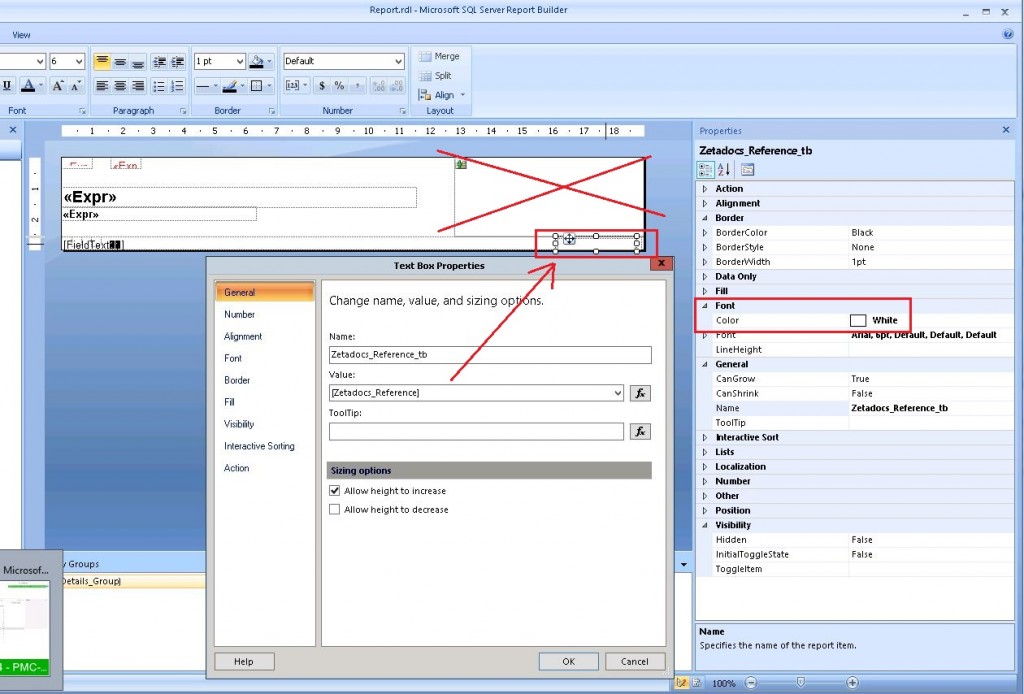
Open the layout and add a text box on top of the table that is in the body of the report. The text box should have a value of ‘Zetadocs_Reference’ which is the column we added earlier. The text box should not show on the print and if you look at a standard ZetaDocs report then they have the text box set as Hidden = True, this didn’t work for me so I made the Font Color White instead (which seem to work worked 🙂 ). The logo in the header can also be deleted since we want to use the ZetaDocs templates to apply this.
Close and save the layout and report you just modified.
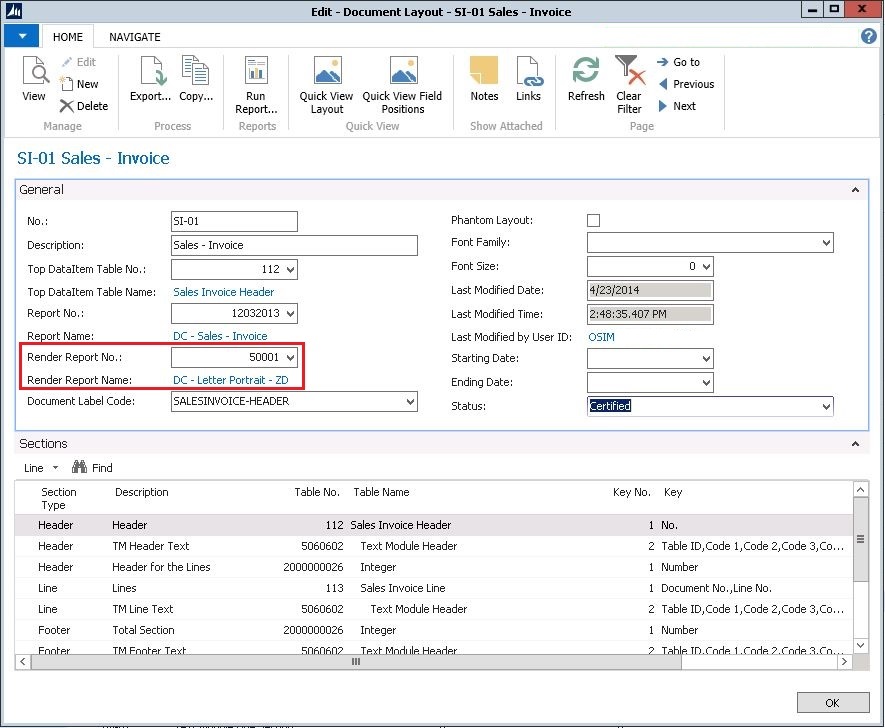
We then need to update the document layout in Dynamics NAV to use the new report for rendering sales invoices. In our case the ‘SI-01’ document layout is used to print sales invoices, so we set the status to under development, change the render report number to be 50001 and then certifies the layout again.
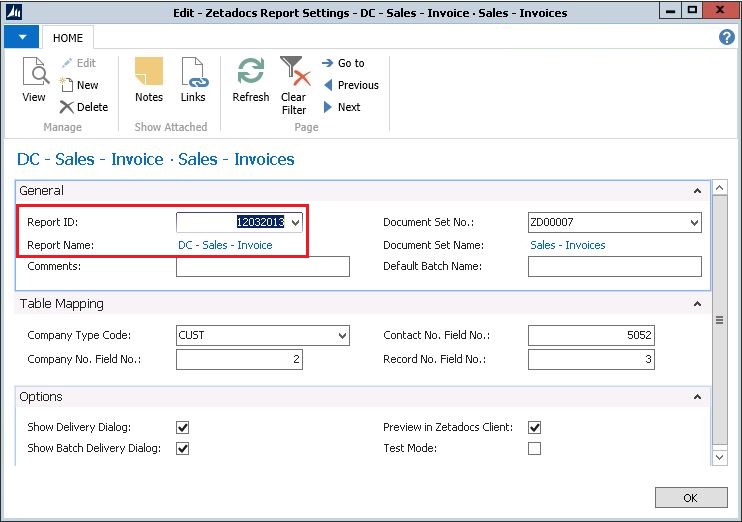
Next we need to create a ZetaDocs Report Settings record with the ‘12032013 – DC – Sales – Invoice’ report.
Note that this is not the same report as the report that does the actual printing. The Document Configurator uses a process only report to generate the data and another report to render the printout. The reports that should be configured in ZetaDocs are the once that the user runs when printing (e.g. same as defined in the report selection table).
That’s it!
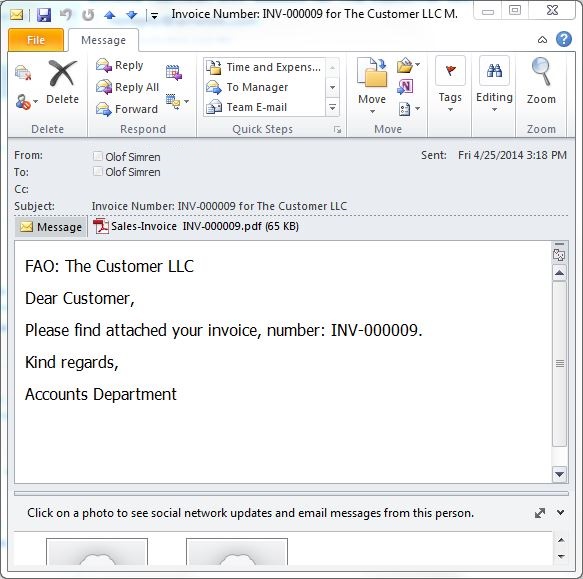
To test it we print a sales invoice from Dynamics NAV and we get a nice looking e-mail with both subject and body according to the ZetaDocs template and with an attached invoice in PDF format.
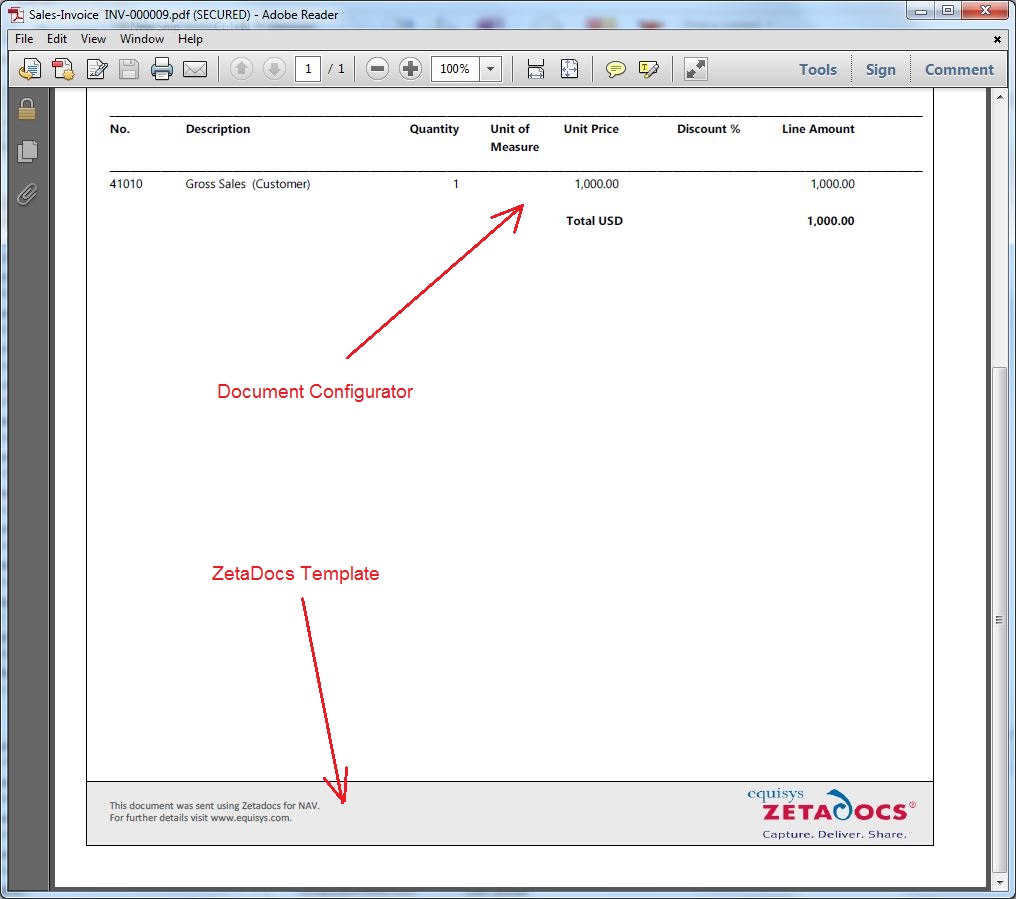
The attached invoice in PDF is the invoice generated from the Document Configurator with a template that provides the frame, header and footer from ZetaDocs.
Now we can continue and just configure the rest of the Document Configurator reports to print with ZetaDocs, all that are using the letter portrait rendering report that we modified earlier should work with ZetaDocs.
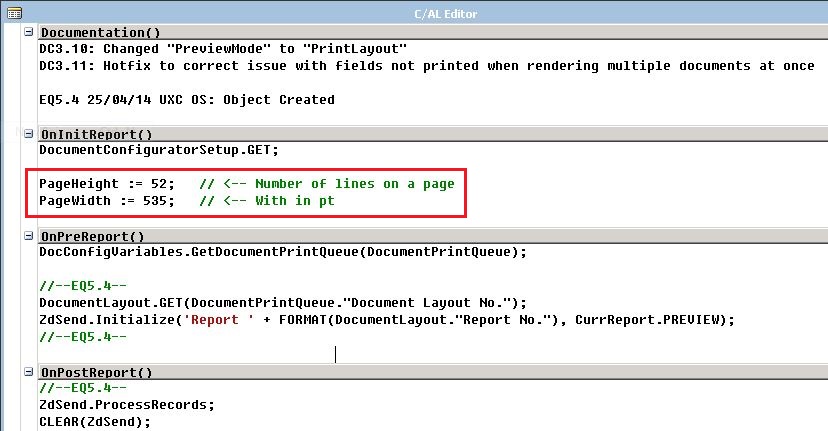
Depending on you ZetaDocs template (e.g. how big the header and footer is) you might need to adjust the height and width of data generated from the Document Configurator. You do this in the OnInitReport trigger of the rendering report.
Since the report is created in Dynamics NAV based on a configuration where all fields are defined with a position and width, it is quite simple to have a ZetaDocs template that provides a frame and match the layout through changing the configuration. No programming needed.
The above example was done with the ZetaDocs version EQ6.0.317 and the Document Configurator version DC3.13.
You can download the report from the Downloads Page.
