Shop Floor Terminal Role Center
For those of you that are reading my blog posts you probably know that I have been working on a Shop Floor Terminal role center for Microsoft Dynamics NAV (mostly for my own training, kind of how I learn). I have finally got some time to finish it (was stuck at Tampa airport for 3 hours before a 3 hour flight, more or less an entire work day in transit), so here it is!
The concept with the Shop Floor Terminal role center is to provide an interface for a terminal in the production where the operator can see upcoming tasks and all the related information such as comments, liked documents, components to be used, etc… It can be used in environments where production orders are routed through work centers (it does not support machine centers at the moment) and where paperwork is not wanted.
It uses custom progress bars to display the progress of each production order (the custom progress bars are described in a previous post called Custom Progress Bar in Dynamics NAV 2013 R2). It also relies on interactions between the role center parts which are also described in an earlier post, called Interaction between Role Center Parts in Dynamics NAV 2013 R2 and it has a custom chart which I described in the Custom Business Chart Add-In Example post. In addition to this it has an information part that displays a running clock and custom messages to the operator.
The objects can be downloaded from the downloads page (installation instructions are in the end of this post), and the purpose is kind of twofold; provide a useful role center for a terminal and also to show how things can be achieved with some C/AL code and .NET components.
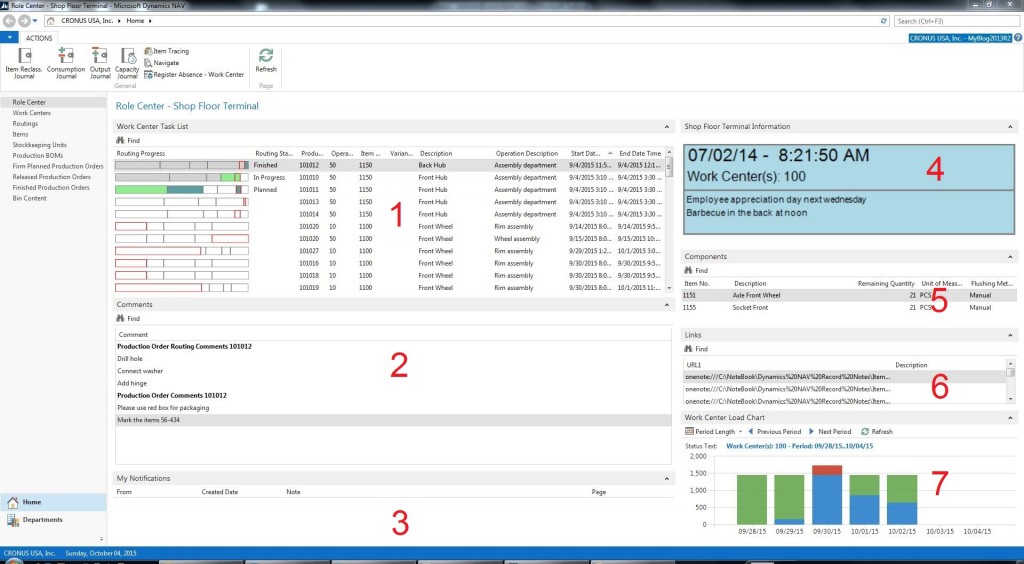
The components in the Shop Floor Terminal role center are;
1. Work Center Task List
2. Comments
3. My Notifications
4. Shop Floor Terminal Information
5. Components
6. Links
7. Work Center Load Chart
1. Work Center Task List
The work center task list is the main part where the operator can see the tasks that are supposed to be run on the work center(s). This list also has some interactions build in; depending on what task that is selected the Comments, Components and Links are displayed related the to the operation. This way you can be completely paperless and the operator can see the information needed just by selecting the task in the task list.
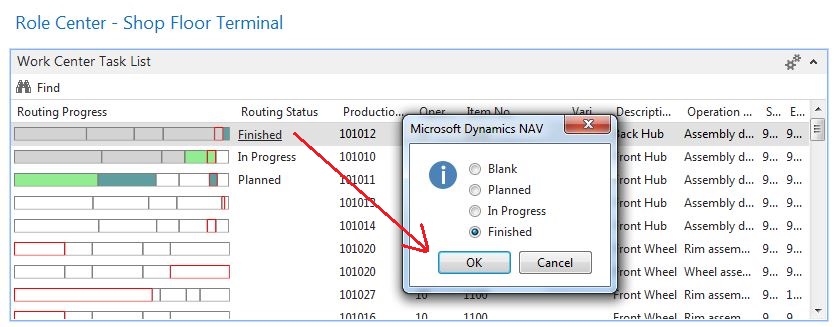
The routing status can be updated by simply clicking (AssistEdit) on it and selecting the new routing status.
In addition, clicking the production order no. will open the production order and clicking the operation description will open the production journal for the production order where the output and consumptions can be posted from.
Note; getting Dynamics NAV to open the output journal populated with the one operation instead of the production journal would not be a big thing to change if required.
The routing progress bar is to be used to determine what production orders that are in progress and are expected to be received. Each progress bar has different sections that represent each operation, the length of the sections indicates the expected capacity need of the operation, the color of the part indicates the status and the section with the red edges represent operations on the current work center. By looking at the progress bar an operator can see the status of the previous operations cross all production order that are scheduled through his/her work center.
2. Comments
The comments part displays the comments associated with the production order. The comments displayed are the comments on the production order routing line highlighted in the work center task list and the comments on the header of the production order.
Note; it would be quite easy to extend this to display comments from the item itself, or from a sales order if the production order is created from a sales order. The comments part is based on a temporary table.
3. My Notifications
The standard Dynamics NAV notifications; nothing unusual here.
4. Shop Floor Terminal Information
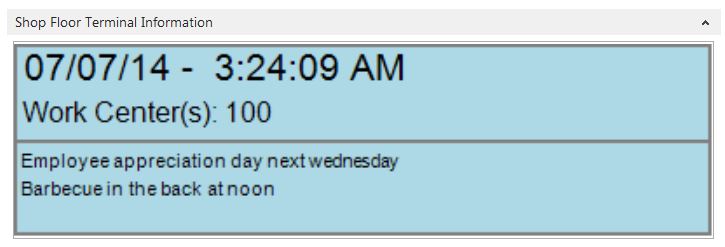
This shows the current date and time (yes it updates itself each second 🙂 ), as well as the work centers that are part of the terminal (in case there are multiple different work centers defined to be displayed at the same terminal).
The lower part can contain a message to be displayed to the operator (the message is defined against the user id in the shop floor terminal setup table).
5. Components
Shows the components related to the operation selected in the task list (using the routing link code as a filter). Nothing strange.
6. Links
The links displayed are the links related to the item being produced. This is typically where you link to drawings and work instructions. Displaying the links like this give the operator an easy access to those documents.
7. Work Center Load Chart
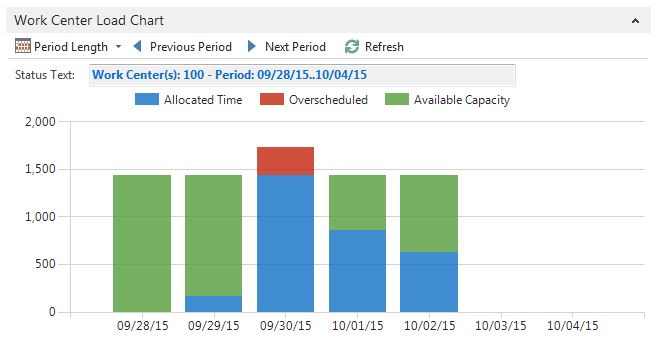
The work center load chart is displaying available vs. allocated capacity. It is intended to provide the operator an overview of how much work there is planned. Green shows available capacity, blue shows allocated time and red shows what have been over scheduled.
The period length can be changed between day, week and month and the period displayed can be moved using the previous and next period buttons.
Installation Instructions
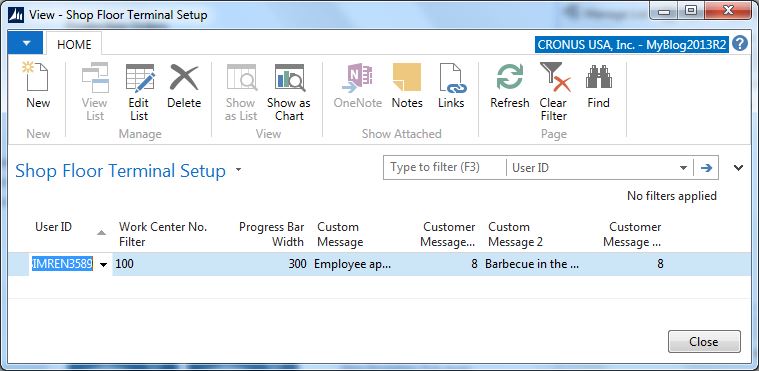
Import the objects that you can download on the downloads page (they are all stand alone objects in the 50080 range). Then run the setup page and link the logins to the work centers.
Note that you can have multiple work centers linked to a logon, you do this with a pipe (|) between each work center code or by specifying a range of work centers with two dots (..) (just a regular Dynamics NAV filter).
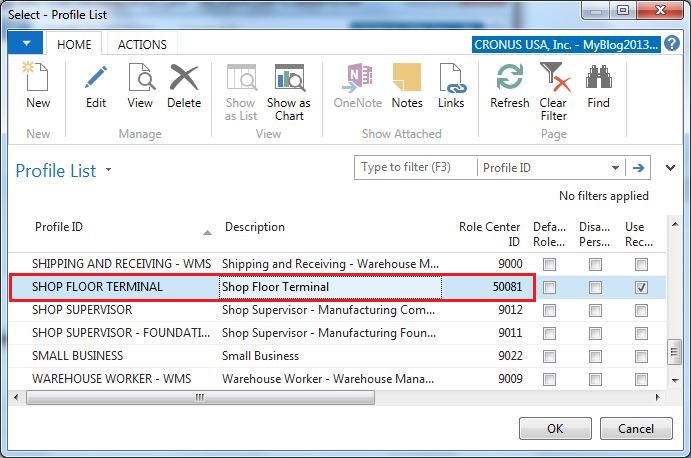
Next you create a role center for the shop floor terminal users. In the below screen shot I called it ‘SHOP FLOOR TERMINAL’. The role center is setup to use page 50081 (as downloaded).
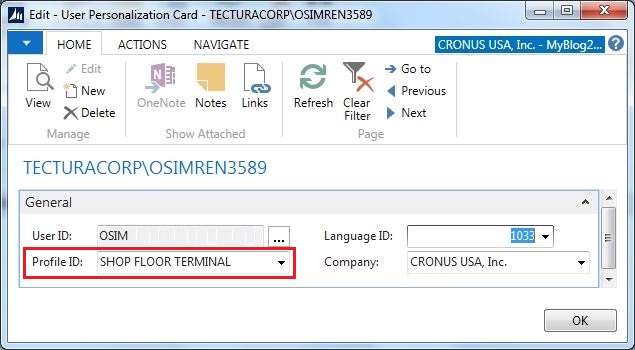
The last step is then to associate the users with the role center through the user personalization.
This should be it.
If you made it this far you might think; why on earth will someone develop all this and put it for download on a blog? Well, good question. 🙂 For me it is kind of how I learn, I learn by doing and by trying to do things that are slightly ‘outside the box’. You can go to Microsoft and get awesome training in how to develop in Dynamics NAV, but if you want to do something like a custom progress bar by using a .NET component to draw a bitmap and stream it back into a blob field for displaying it in the client you have to use you creativity and find a way to do it yourself.
I hope at least this can provide some inspirations. 🙂




5 Comments
Leave your reply.