Activate WMS Functionality for Existing Location
This blog post describes how you activate the ‘Directed Put-away and Pick’ functionality (also known as WMS or advanced warehousing) for an existing location in Microsoft Dynamics NAV.
It could for example be that you have been using Dynamics NAV for a couple of years and your business has grown or changed and you want to start using the WMS functionality for an existing location (or at least check the functionality out in a test environment).
Below is the process to do this, step by step. The screenshots are done by converting the ‘BLUE’ location in a Cronus company (the ‘BLUE’ location is a location without any bins or warehouse documents used). This should work from version 3 (Navision Attain) to the 2016 version.
1. Complete the Warehouse Setup
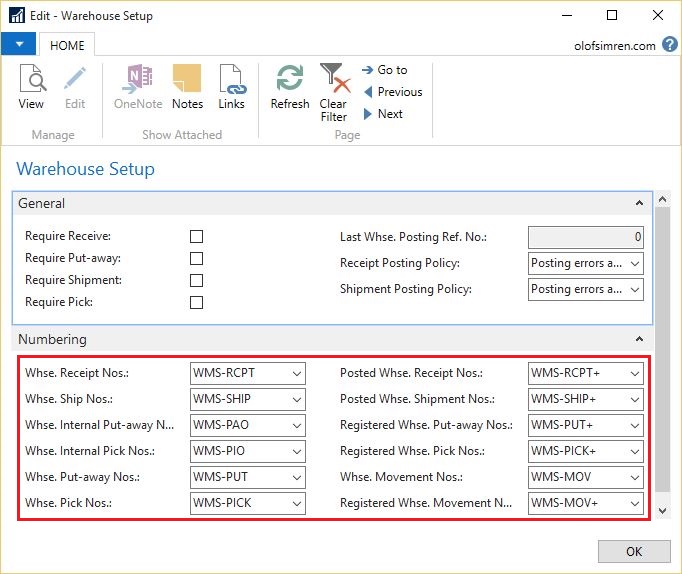
The first step is to setup the numbering series for all the warehouse documents in the warehouse setup table. If you have never used any of the warehouse functionality then this is probably all empty (in a Cronus database the setup is already done as below).
2. Create the Bin Types
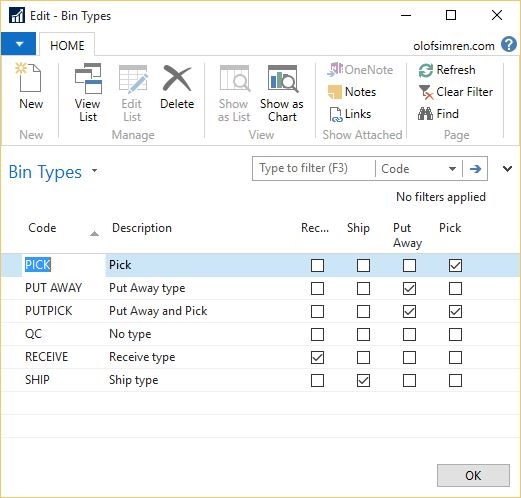
In the WMS environment all bins has a type that defines what type of activities you can do with it. The bin types can more or less be copied from a Cronus environment (the number of combinations and the codes in a Cronus database is kind of what you need, maybe the QC one should be called BLANK instead because it is used for more than QC, but that is a minor thing).
3. Create the Zones
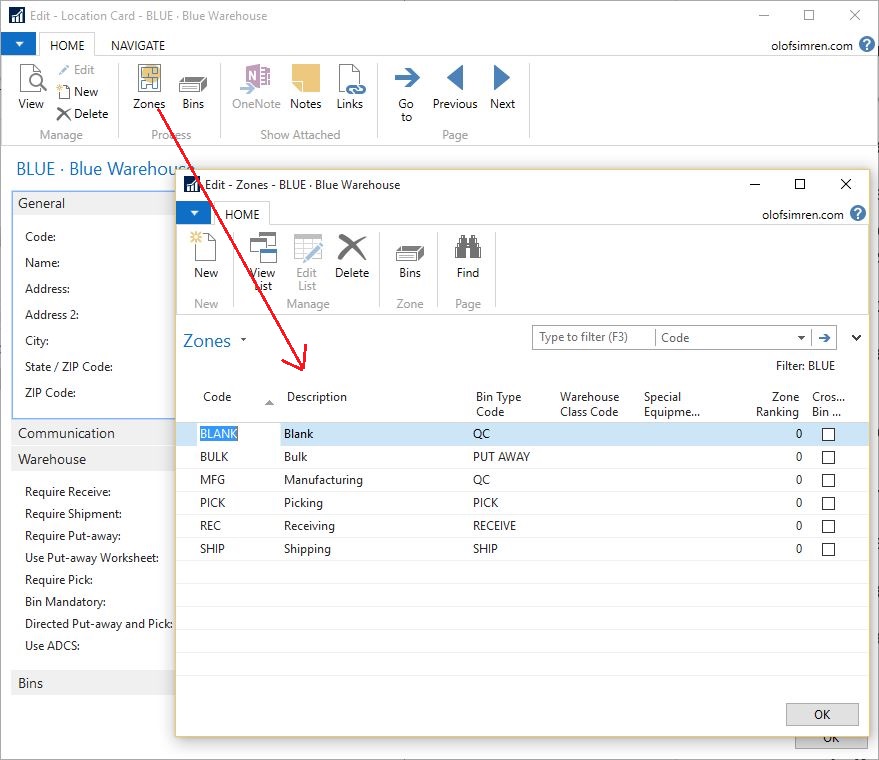
Next you need to setup the zones on the location. This depends a bit on the layout of your warehouse, the zones in Dynamics NAV are used to default properties onto the bins within the zone and you can create picks by zone. Typically you want a receiving zone, a shipping zone, a blank zone (for the adjustment bin), a picking zone, a bulk zone and maybe a manufacturing zone. Something like below.
4. Create the Adjustment Bin
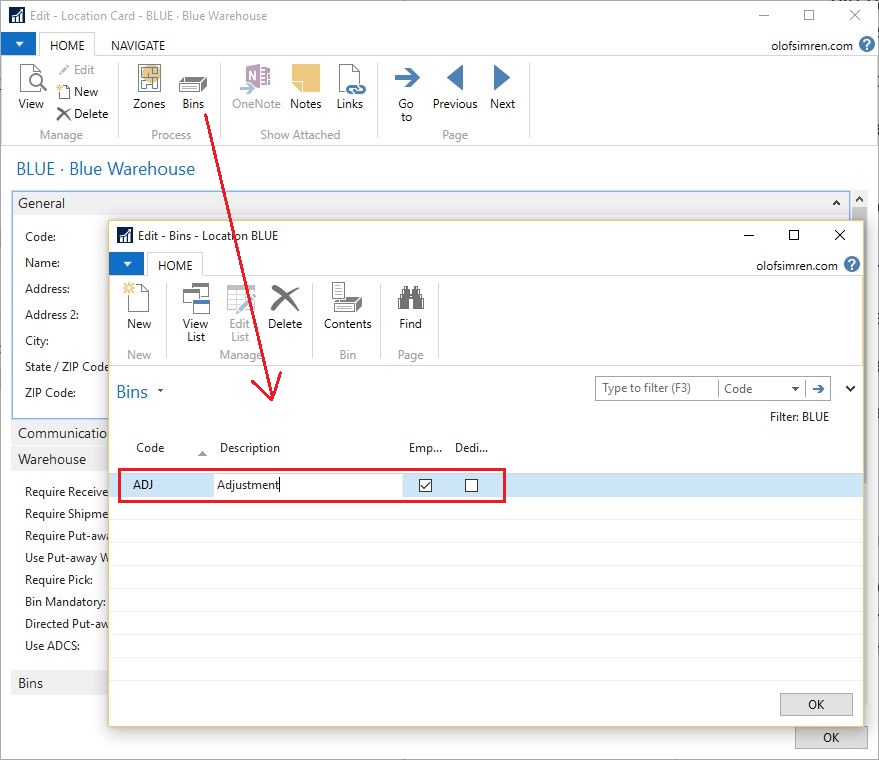
The adjustment bin is a virtual bin that is used when inventory adjustments in the WMS part of Dynamics NAV are done. It can be created like below (leave the zone code blank).
5. Run Check on Negative Inventory
In a WMS environment you can’t have negative inventory. Run report 5757 – Check on Negative Inventory to make sure you don’t have negative inventory on the location you are about to convert. If negative inventory shows up (like below) you need to adjust it before the next step.
It should look like below, with no negative inventory identified.
6. Run Create Warehouse Location Batch Job
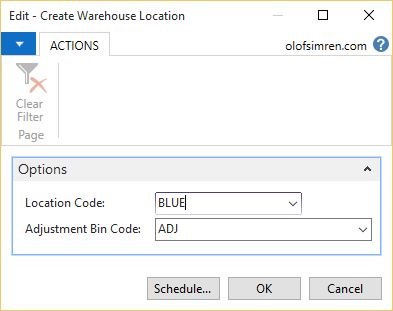
Next step is to run the Create Warehouse Location batch job, this is report 5756. When you run this you select the location to convert and the adjustment bin created previously.
Select Yes in this massive confirmation dialog, no need to read it all. 🙂
Wait unit the batch job is done. This can take a while depending on the amount of data. I have done this types of conversions where it has taken hours to convert the data. What the batch job do is to go through all items where there are some inventory at the location being converted and registers it into the adjustment bin by creating warehouse entries (populating a temporary warehouse journal line table and registering it actually).
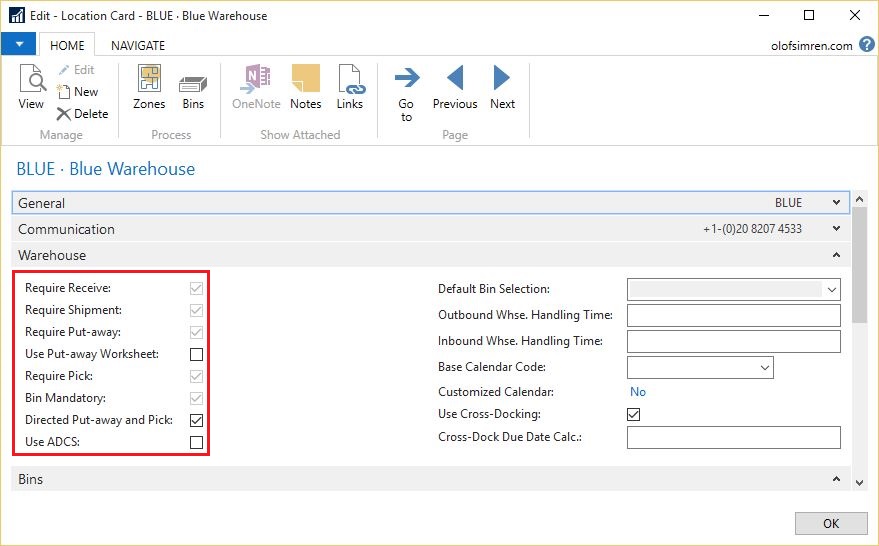
When the batch job is done the location is setup as a WMS location.
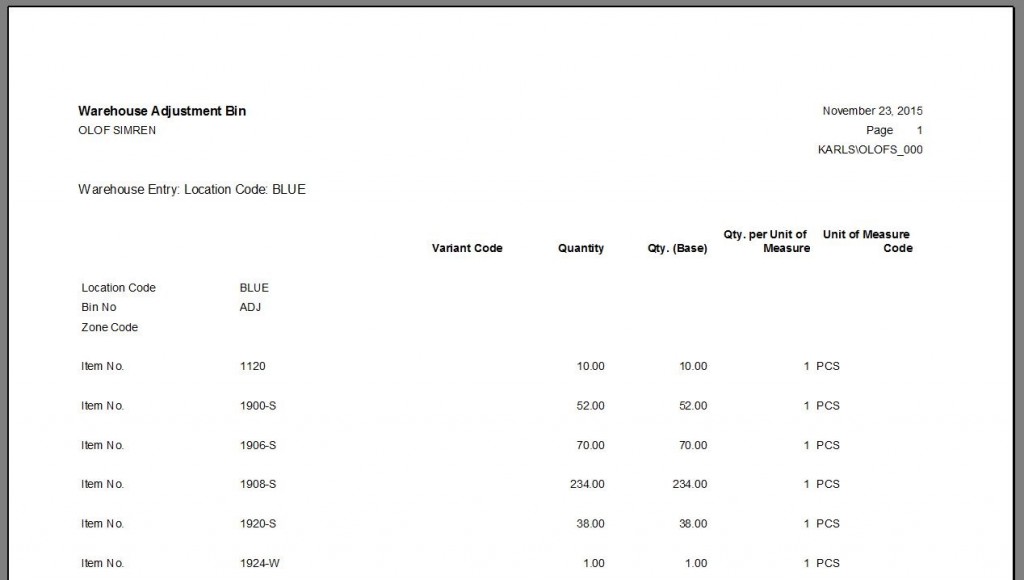
The entire inventory is now in the adjustment bin (you can see it in the whse. adjustment bin report for example).
7. Add the Bins
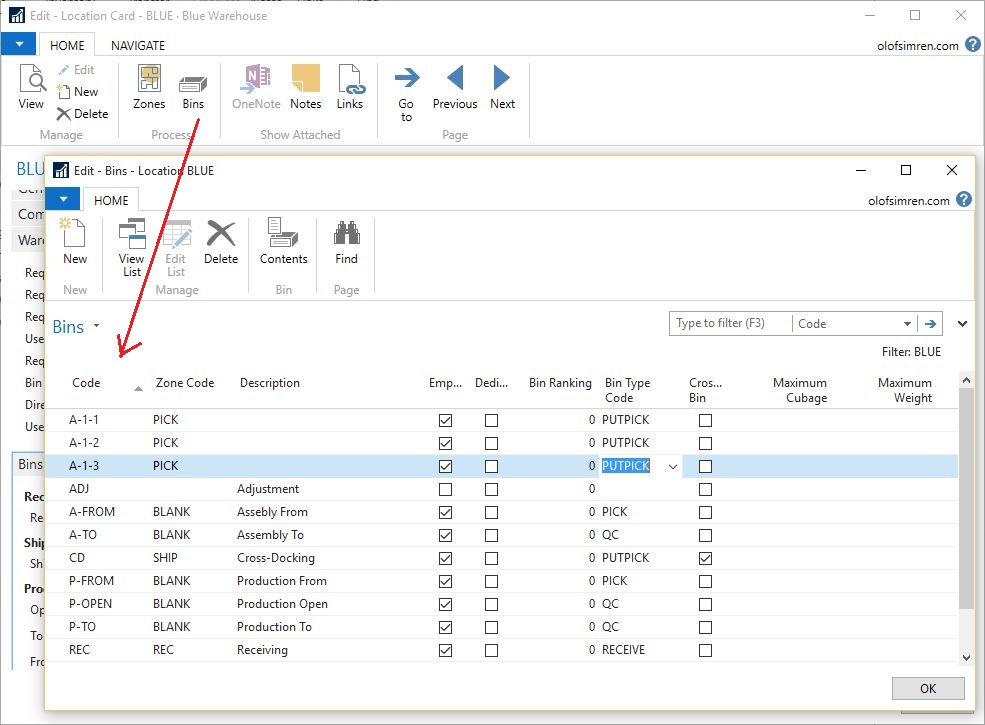
You now need to add the bins including the zone codes, bin type codes and bin ranking (if the location already had some bins then those needs the WMS related fields updated).
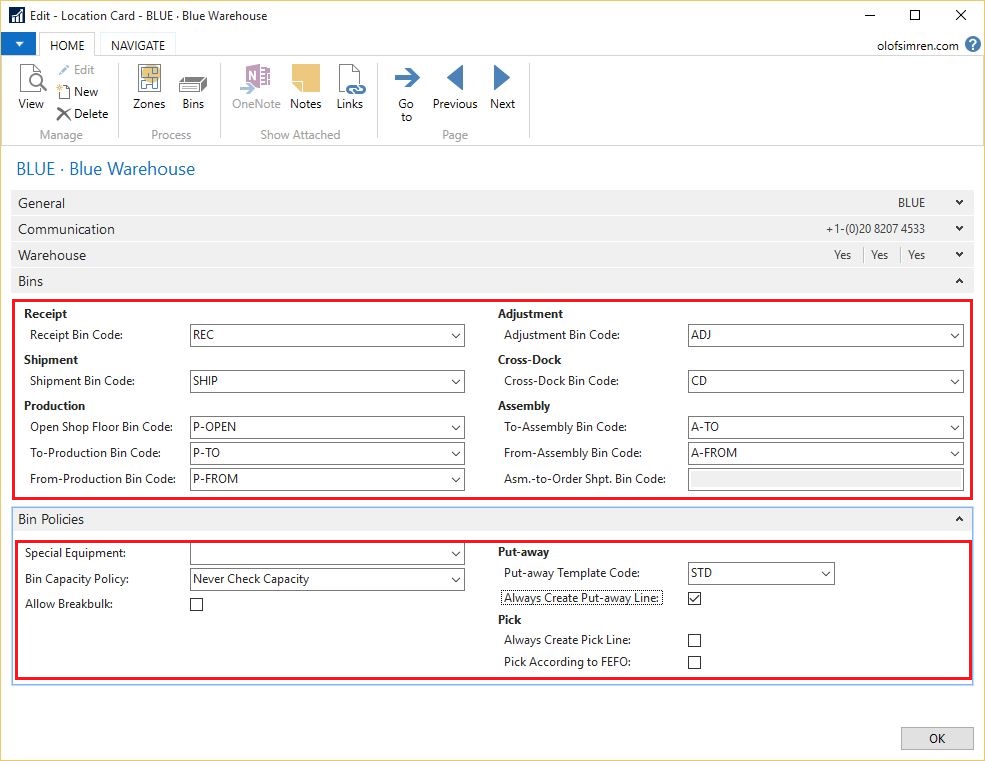
When the bins are created, make sure to also create bins for receiving, shipping, cross-docking, production and assembly.
Note; Dynamics NAV has a bin creation worksheet that can be used to create bins, as an alternative to creating them in Excel and importing it. Also note that the zone and bin type code for the adjustment bin needs to be added when that bin is empty later in this process.
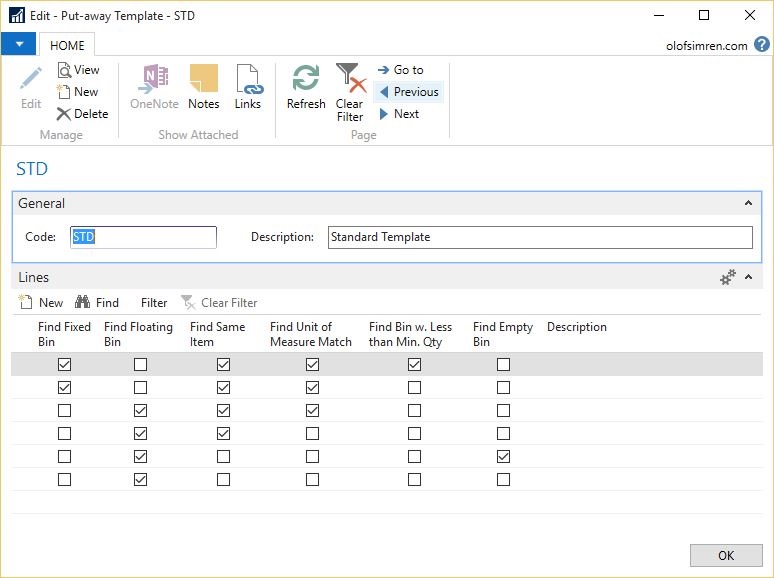
8. Create Put-away Templates
Create the put-away templates that are going to be used (you need at least one that is defined as the default on the location card, then you can do specific ones that you attached to the items later). Below is the standard one in Cronus.
9. Complete the setup on the Location Card
The location card now needs to be completed by entering the different bins on the bins tab and setup the fields on the bin policies tab.
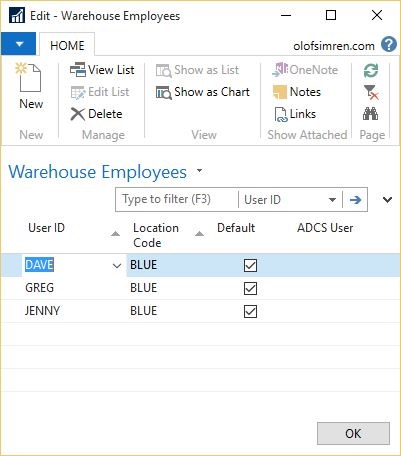
10. Setup Warehouse Employees
The warehouse employees needs to be setup for user to be able to access the warehouse documents on the location. Just add the users that needs access to this along with the WMS location (that you probably want to set as the default one).
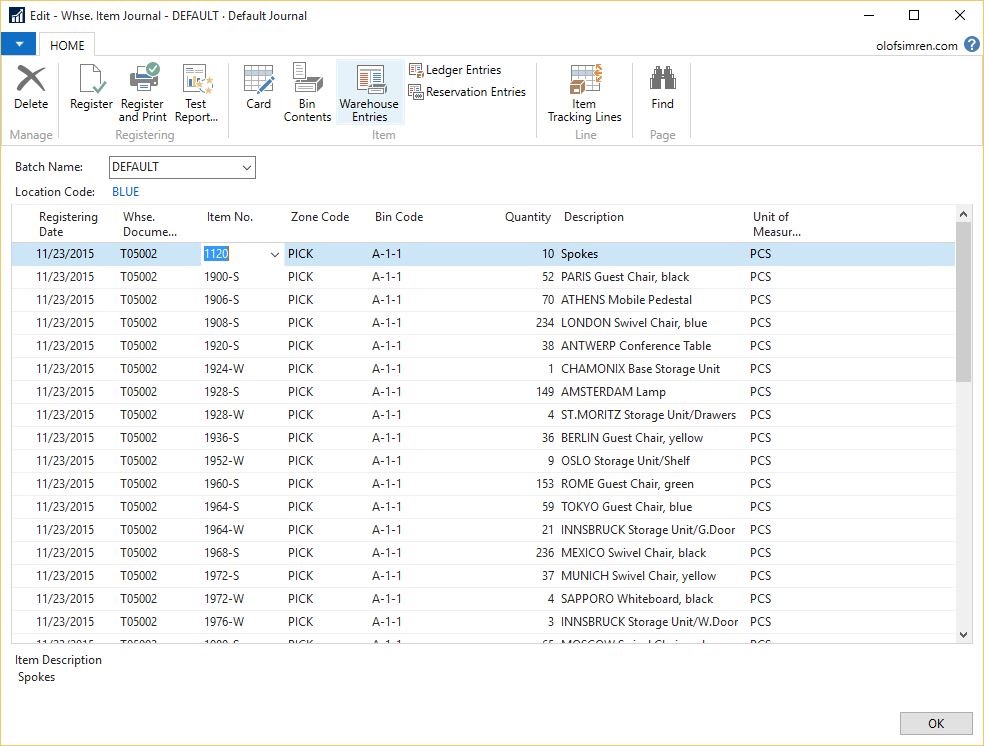
11. Register the Whse. Phys Inventory Journal
You now have a WMS location setup, but the entire inventory sits in the adjustment bin. To move the inventory to its bins you need to post the whse. phys. inventory journal (or a regular whse. journal). You can do this by populating it manually (like doing a stock count) or importing the lines from an Excel spreadsheet.
The total quantities for each item needs to correspond to what is in the adjustment bin (this will be confirmed in the next step).
After the journal is populated it is registered (note that WMS activities are registered not posted, they don’t create ledger entries or g/l entries).
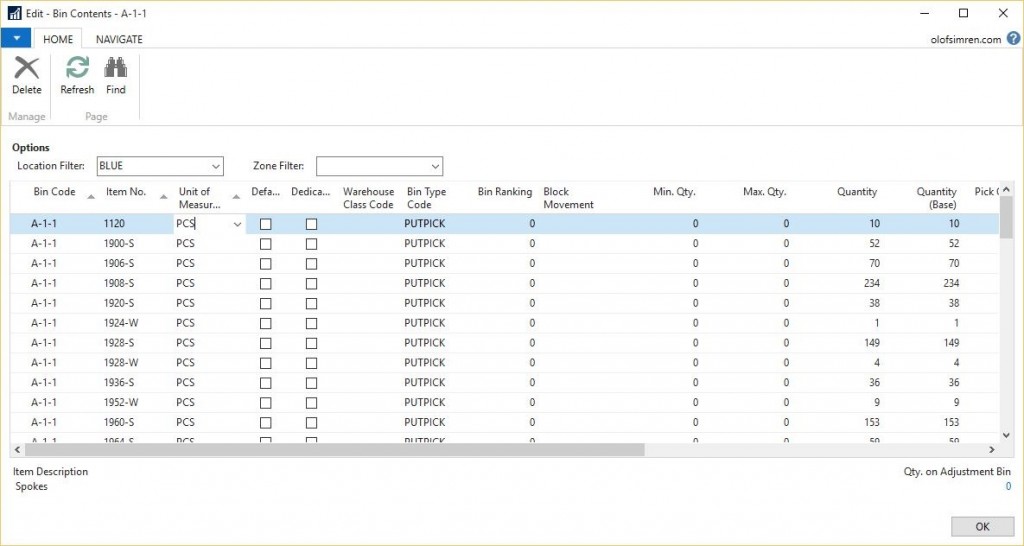
You now see the inventory in each of the bins in the bin content page.
12. Verify that the Adjustment Bin is Empty
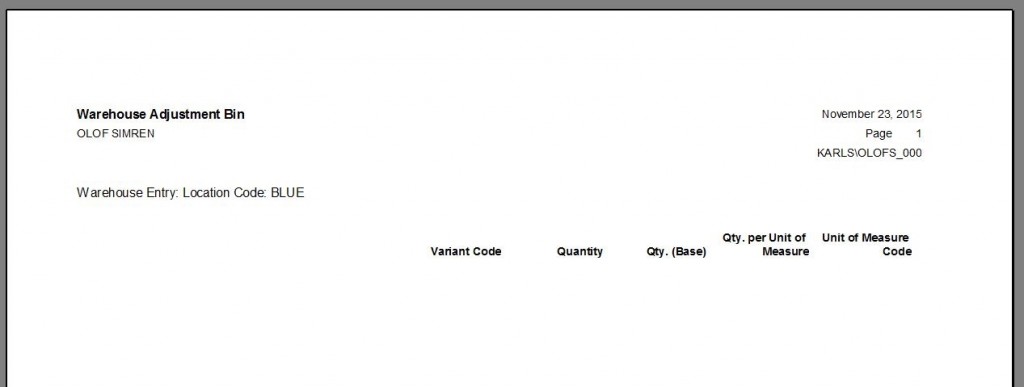
It is recommended that you at this stage (before you start using the location) verifies that the adjustment bin is empty. You can do this running report 7320 – Whse. Adjustment Bin report. It should look something like below.
If there are still items in the adjustment bin you need to go back to step 11.
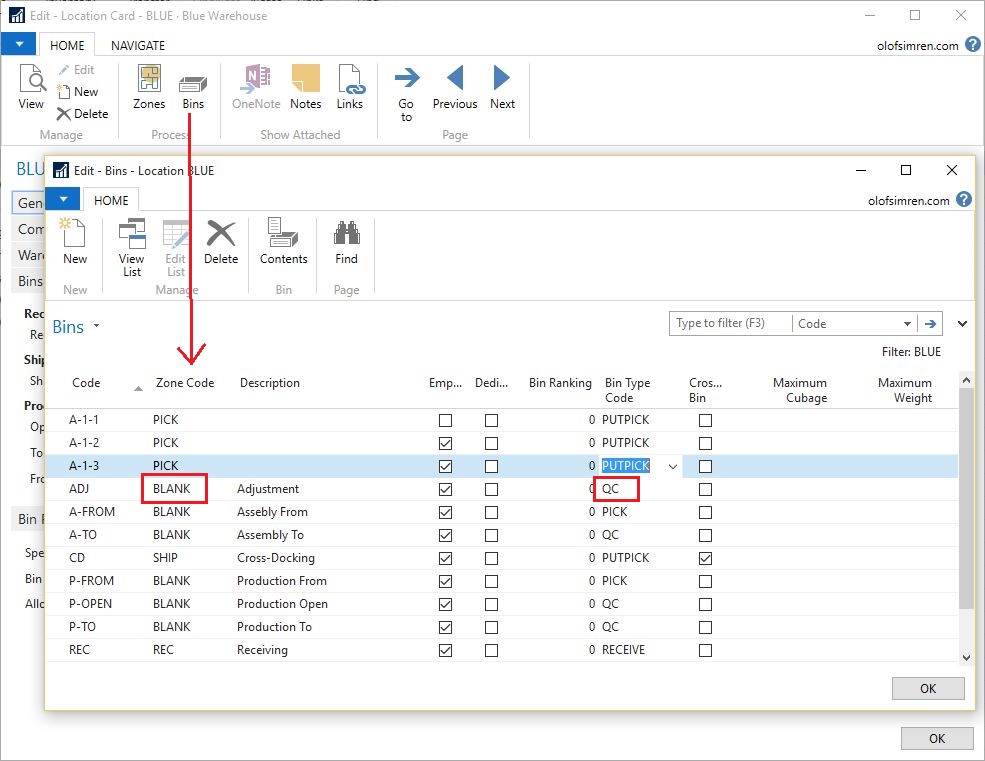
13. Add the Zone Code and Bin Type Code to the Adjustment Bin
The next step is then to add the zone code and bin type code to the adjustment bin.
14. Reopen and Release Orders
If you have orders that are released for the location you just converted then those needs to be reopened and released again. The reason for this is that the warehouse request records needs to be created. A warehouse request record is created when an order is released if there are any related warehouse activities (like warehouse shipments or receipts) required to process it. So, if the location didn’t require any warehouse activities before, then there are no warehouse request records either. Just reopening and releasing them again will create those records. Depending on the number of orders you have in your system you can either do this manually or have a function programmed that will do it for you automatically.
That’s it! Now you have activated the WMS functionality on your location and it is ready to use! Happy warehousing! 🙂
Worth knowing is that it is harder to go the other way, so make sure that you won’t change your mind after converting it.
Remember to share this post to support my blog a bit, if you like it that is.


15 Comments
Leave your reply.