Interaction Between Role Center Parts in Dynamics NAV 2013 R2
I thought it would be cool to be able to get the role center parts to interact with each-other in Microsoft Dynamics NAV 2013 R2. I wanted to see if it was possible to have a role center part to display different information based on what was highlighted in another role center part. This way the role center itself would become more interactive.
To test this I wanted to have a role center part with a task list for a work center and based on what operation that was highlighted the related components from the production order should be displayed in another role center part.
This was actually easier than I initially though. There are (at least) two ways to do this, one simple and one more advanced. The simpler approach is to use the ProviderID and SubPageLink properties on the role center part with the components and the more advanced approach is to use a single instance codeunit with global variables representing the filters and add the PingPong add-in to the components page to retrieve the values and apply the filters within intervals.
Below are the two approaches.
First Approach – ProviderID and SubPageLink Properties
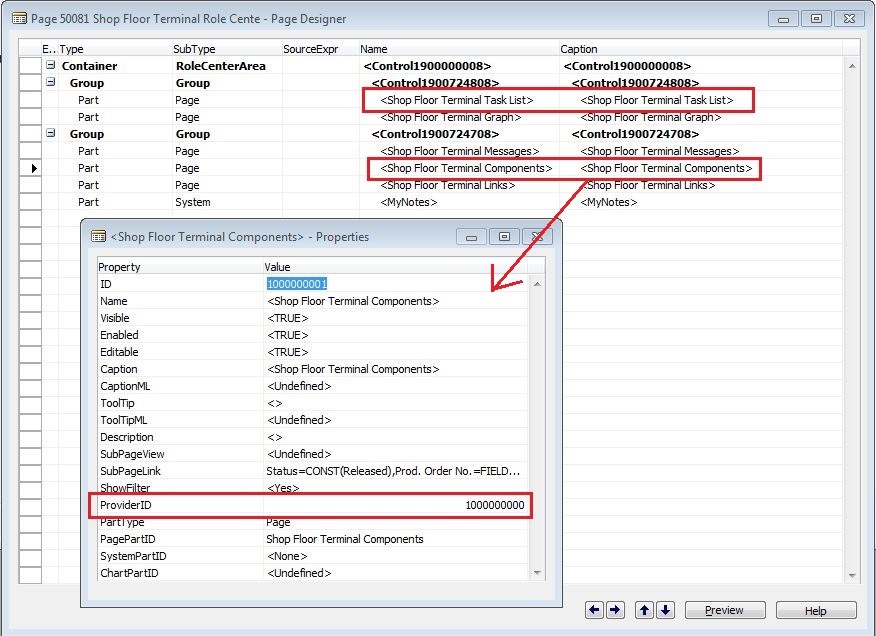
The ProviderID is typically used for Factboxes but can also be applied to other types of parts to specify from where then link will come from (this is also useful if you want to have multiple subforms on a page).
Below the ProviderID on the Shop Floor Terminal Components part is set to 1000000000 which is the ID of the Shop Floor Terminal Task List part from where we should retrieve the values for the filters.
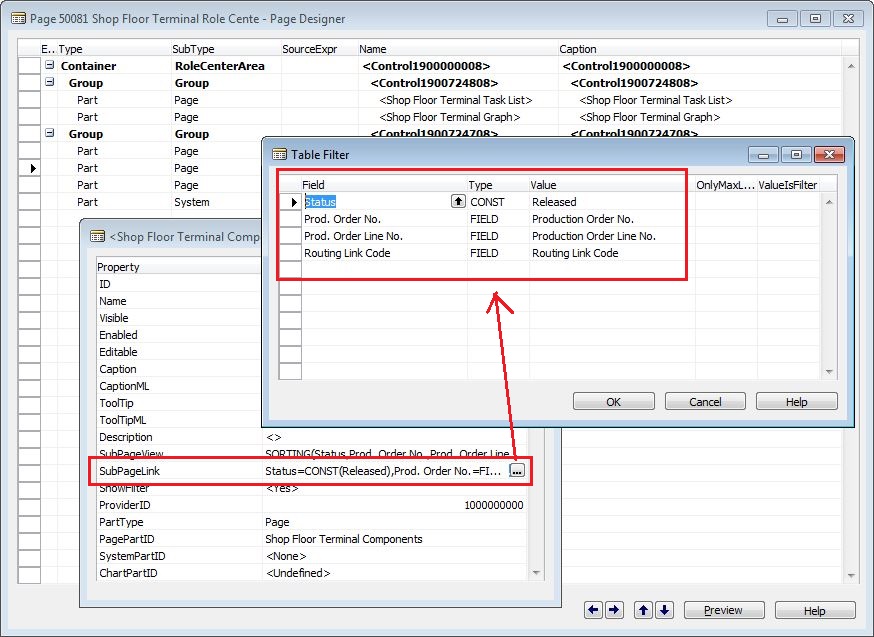
When the ProviderID is set the SubPageLink property refers to the records in that page. So it is just a matter of specifying the filters, the left columns are the fields in the components page and the right column are either constants or the fields from the records in the page specified as the ProviderID (in our case the task list records). This is it, simple and nice! 🙂
Second Approach – Single Instance Codeunit and PingPong Add-in
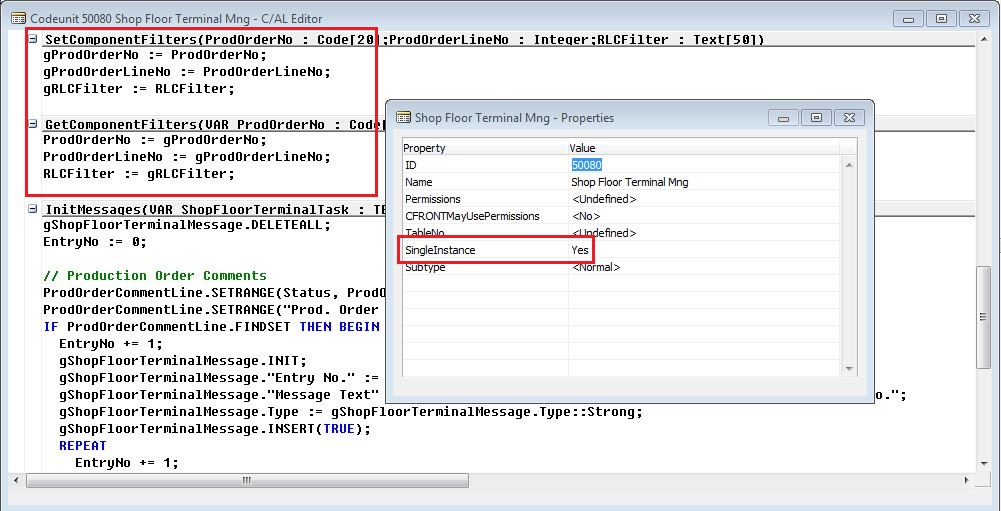
The first step in this approach is to create a single instance codeunit with global variables that should be used to set the filters in the second role center part. The codeunit then has one function to set the variable and another function to get the variables.
The single instance is set in the property of the codeunit. From the Dynamics NAV help: ‘When you set this property to Yes on a codeunit, all codeunit variables that use this codeunit use the same instance. That is, all codeunit variables of this codeunit use the same set of internal variables when the code is running on the same client. The codeunit remains instantiated until you close the company.’
I name my functions SetComponentFilters and GetComponentFilters, both of them uses three global variable for the production order number, production order line no. and the routing link code. Those are the fields I need to filter my list of components.
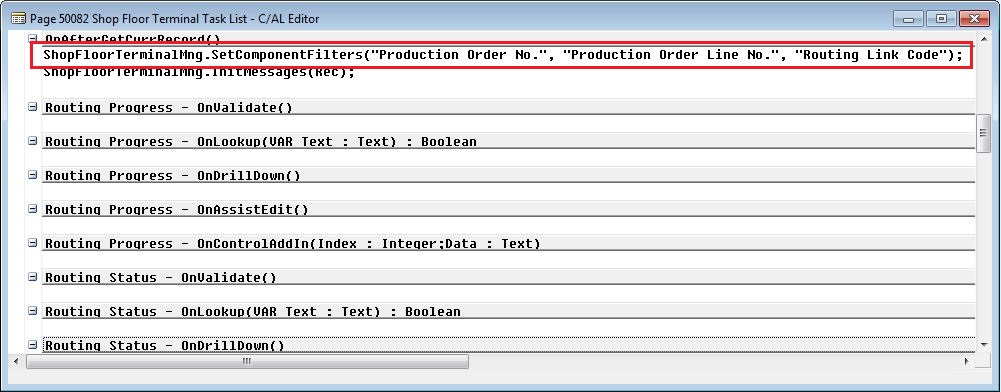
Next is to put code in the first role center part (the task list) to set the global variables in the single instance codeunit based on what record that is highlighted. We do this in the OnAfterGetCurrRecord function by calling the SetComponentFilters function in the single instance codeunit previously created.
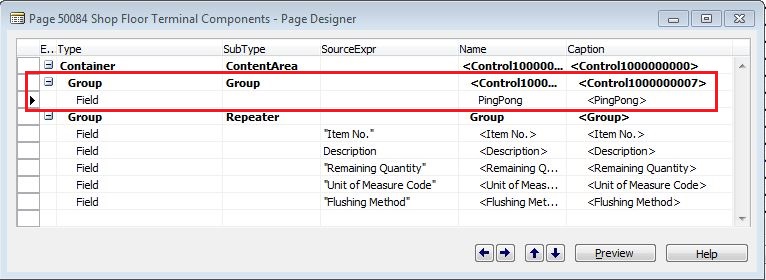
Then we use the PingPong add-in in the second role center part as a timer to retrieve the variables, set a filter and update the page within intervals when the page is open. To do this we add a field within a group with the SubType equal to Group (note; adding it withing a repeater group will not work for some reason) and give it a name (in my case I named it PingPong).
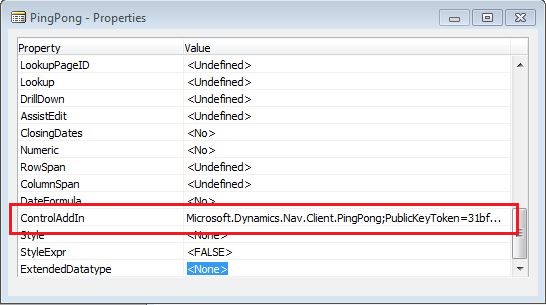
We then open the properties of the new PingPong field and select the PingPong add-in in the ControlAddIn property of the field. From the Dynamics NAV help: ‘The Microsoft Dynamics NAV PingPong add-in can be invoked to request a callback after a specified timeout. The PingPong add-in does one callback on request. The callback is requested from C/AL code by specifying the time to wait in milliseconds.‘
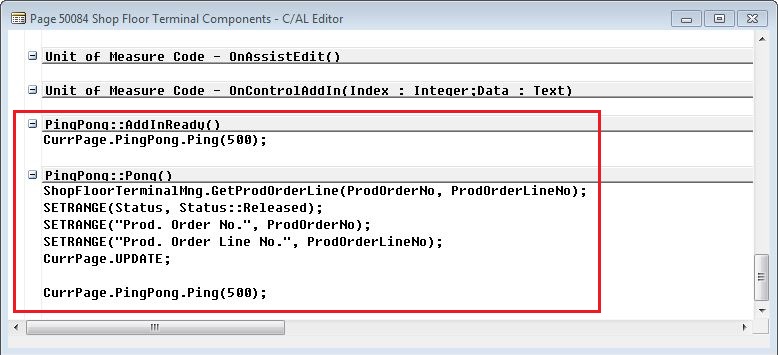
Once we have selected the PingPong add-in we can put code in the PingPong::AddInReady and PingPong::Pong functions (funny names I know 🙂 ). In the PingPong::AddInReady function we put code to initiate the ping after 500 milliseconds, in the PingPong::Pong function we put code to retrieve the variables, set the filters, update the page and then call the ping again after 500 milliseconds. This then works similar to the old timer that you could use in the classic client. That’s it! A bit more complicated than the first approach but good to know.
Test the Role Center
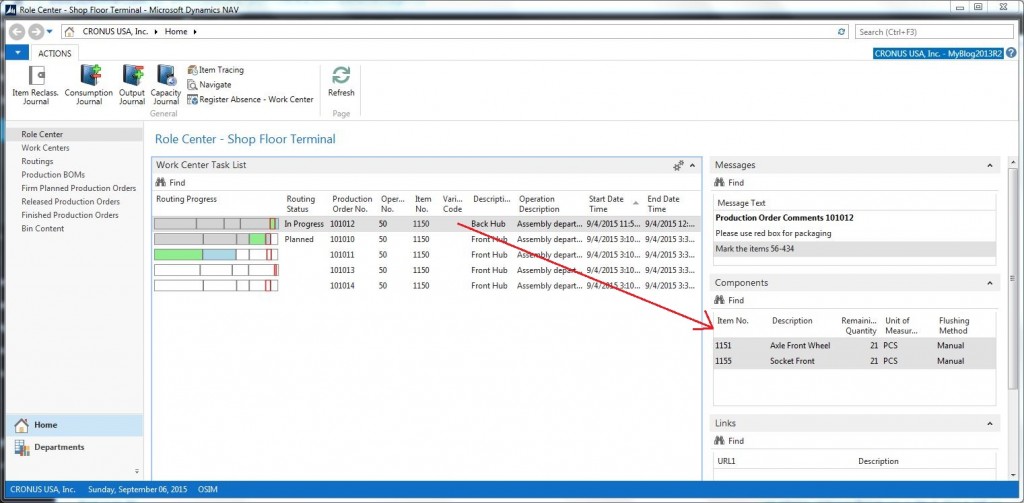
Now when I run my role center I can select different lines in the task list part and the part that show components will update accordingly and only show the components that are linked to the selected operation (the result for the two above approaches are the same). Sweet! 🙂
Conclusion
I would definitely recommend the simpler approach (by just setting properties), but there are situations where you might want to do more than setting filters in the second role center page. If you look at the screen shot above you also see a Messages role center part to the top right, this part is a temporary table that displays messages based on production order comments, routing tools, etc. doing this requires the second more advanced approach since it is a bit more that just setting a filter.
As you can see, I am building a shop floor terminal role center for Dynamics NAV. In a previous blog I described how to create custom progress bars, which is also part of this role center (as a status indicator in the task list). If this role center gets ready to be used I will make it available in the downloads section. There are still some pieces missing, but maybe in a month or so it will be ready.
