Processing of Shipments
There are four ways to process shipments of inventory in Microsoft Dynamics NAV. Which way to choose depends on the business requirements and what processes that are most suitable.
I typically discuss the different options early in the analysis phase of an implementation to establish the preferred method as soon as possible (if it is not obvious which one to apply that is). It is important to get it right early since the procedures, work instructions, potentially modifications and printouts all will depend on the method chosen (and you don’t want to change your mind half way through the project).
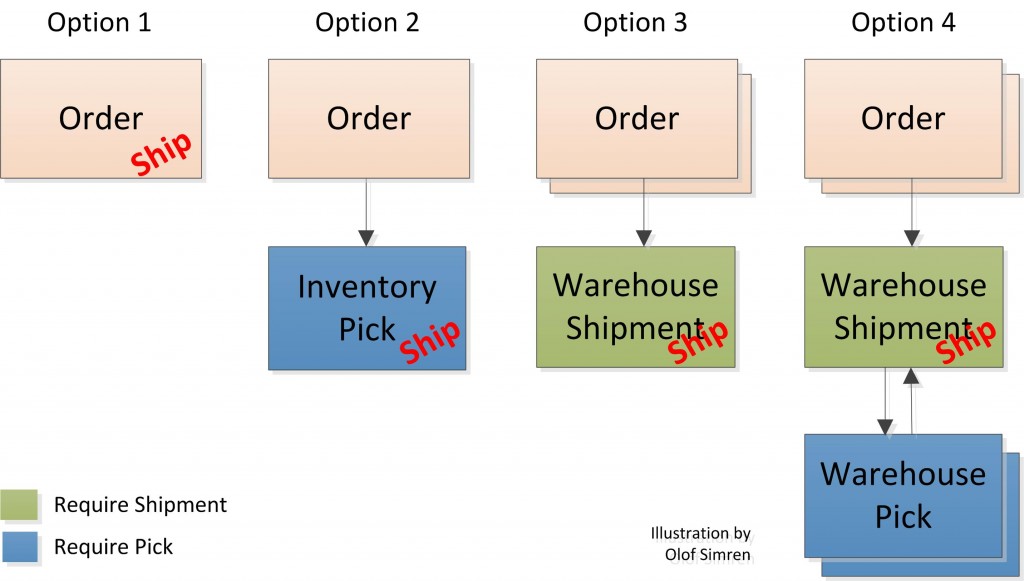
Below is a description of each of the four methods in Dynamics NAV together with their pros and cons. The illustration is something that I typically do on a white board during the sessions when this is discussed (now I guess I can just refer to this blog post, and almost eliminating myself 🙂 ). The ‘Ship’ in red indicates from what page the shipment is posted.
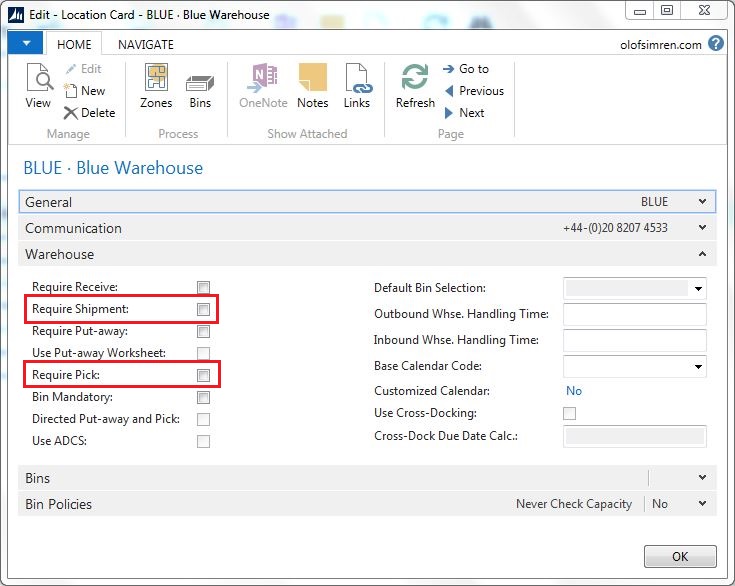
Note: Note that ‘Order’ refers to all types of orders that can be shipped; sales orders, purchase return orders and transfer orders. The configuration for how to process shipments are made on the location card with the two fields require shipment and require pick.
Option 1: Shipping from Order
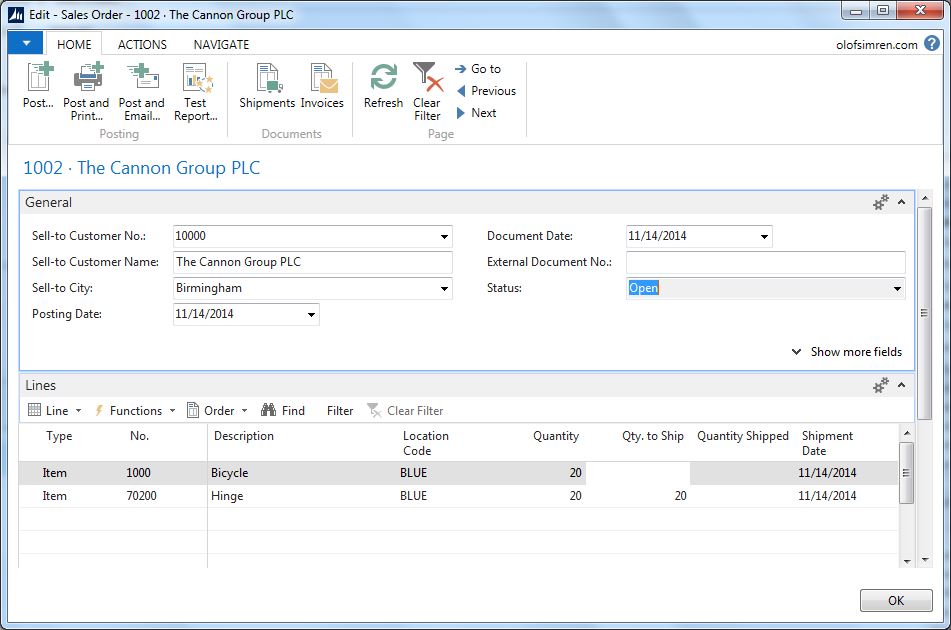
Shipping directly from the order is the simplest way of shipping something in Dynamics NAV. You basically just open the order, enter the quantity to ship on the line(s) you want to ship and then post it. The biggest downside of this used to be that the person doing the shipping had to be working on the order pages (screens) and therefor had the potential to accidentally modify the orders and see data not needed to be seen. Now, since the newer clients are role tailored this is less of an issue since you can easily make simplified order pages by removing unnecessary action items and fields for a certain profile. It could look something like below where all prices etc. are removed from the lines and functions not needed removed from the ribbon.
With the role tailored client you can also easily create things like shipping queues (based on order lines) for the users to know what is due to be shipped (see previous blog post Add Order Lines to Navigation Pane).
If you want a printout for an employee to pick the parts then there is a picking instruction report that could be used. This simply prints the order with the lines without showing, for the picker, irrelevant information such as pricing and taxes. It can also be designed to include internal notes, packaging instructions, etc..
The downside of this method is that you can only ship one order at a time and there is no real good way of seeing what is available to ship. The user shipping also typically needs to operate on three different screens; sales order, transfer order and purchase return orders.
Another potential downside is if you are using bins; since with this method you can only really ship from one bin at a time per sales order line. So a scenario where you have the same item in multiple bins might complicate the shipping process a bit since you need to move some items first to be able to ship them all at once.
An upside is that you can not only ship inventory this way but also resources, item charges and g/l accounts.
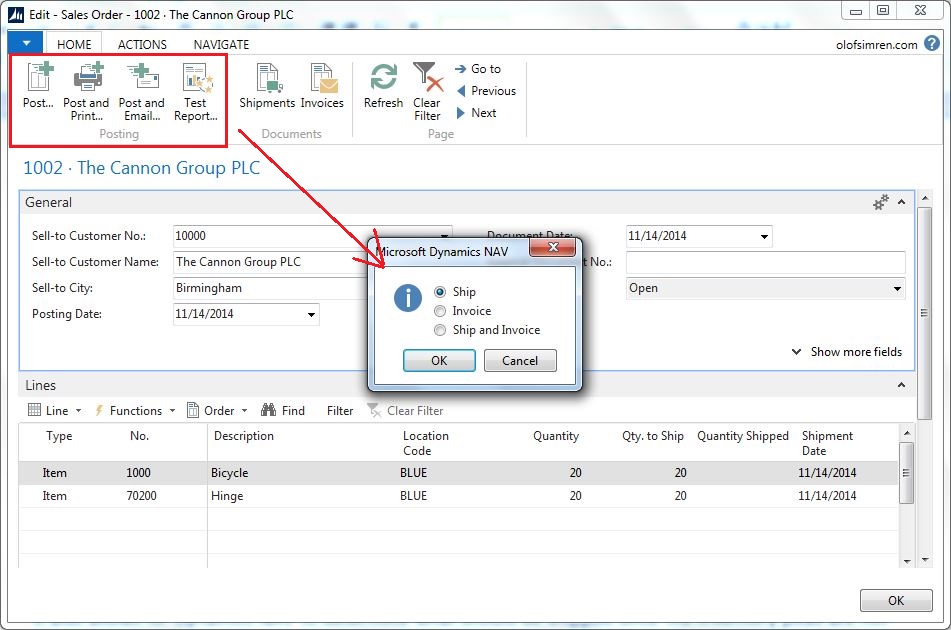
Posting of the shipment is done from the header of the order. Doing a post and print will print the packing slip that goes with the items (which are normally something you want to do).
Option 2: Shipping from Inventory Pick
The second option is to use an inventory pick to ship the inventory in Dynamics NAV. The main advantages with this is that the user processing the shipments are using a simplified interface (the inventory pick) which is the same no matter what type of order that is shipped.
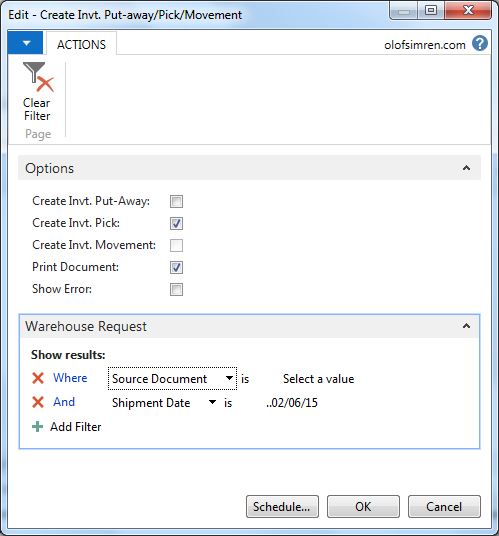
It also allows for Dynamics NAV to determine what should be shipped since the inventory picks are not created if the item is not available in inventory to pick. The typically way of using the inventory pick is to run the create inventory pick batch job a couple of times a day with a filter indicating how far ahead items should be picked (something like; create picks for everything that is available to pick that should be shipped up until tomorrow).
Note that the above filter on the shipment date applies to the shipment date in the header of the orders; if you are entering orders with multiple lines on different shipment dates then this might need to be tweaked a bit.
Dynamics NAV then goes through the released orders and if there is anything to be shipped within the date filter then an inventories pick will be created and printed if the item(s) are available in inventory. The employee can then just grab the picks from the printer and start processing them (and potentially use something like the shop floor barcode system to post it as picked using a scanner).
You can also create the inventory pick directly from an order, this could for example be useful if an order should be expedited and picked directly (without waiting for the next time the above batch job runs).
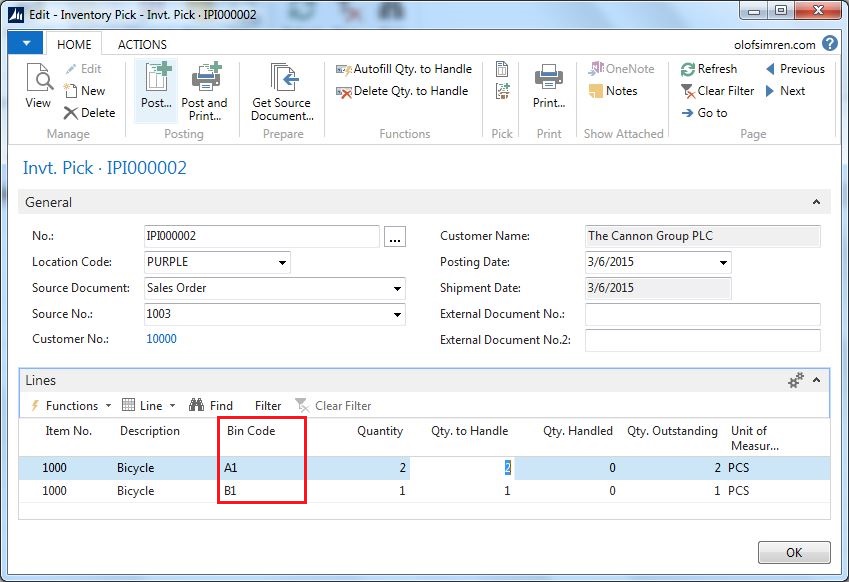
The other advantage with inventory picks if you are using bins is that you can split a line and therefor pick from multiple bins at the same time. In fact if you have the same item in multiple bins Dynamics NAV will suggest that you first pick from the items default bin and thereafter from other bins in alphabetical order where the item is available. Which is quite nice.
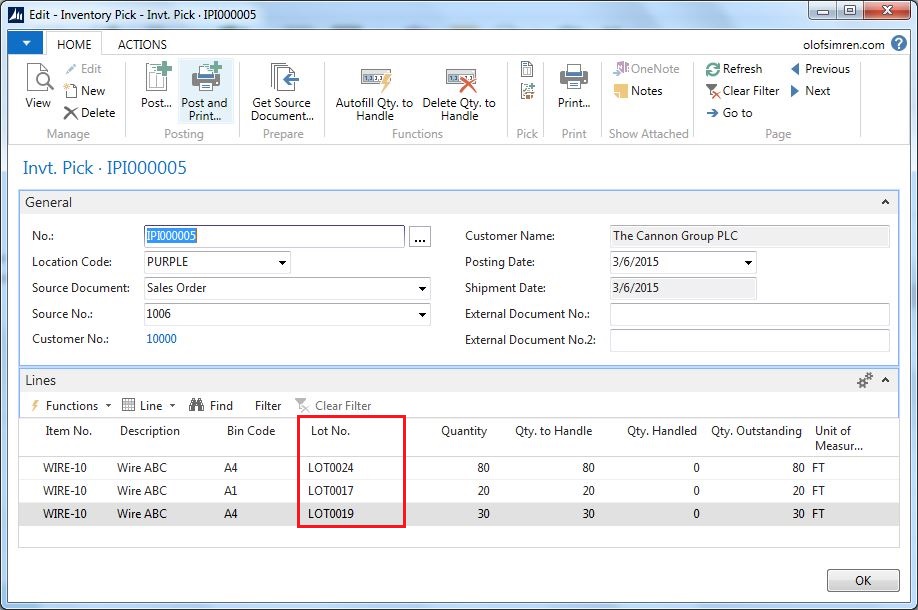
If you pick items that are lot and/or serial number tracked then the lot and/or serial numbers will show up on the lines of the inventory pick. This is something that users often see as a convenient thing (they don’t need to use the item tracking lines form) and you can also have Dynamics NAV to suggest the lots for you during the creation of the inventory picks using FEFO (first expiration date first out).
Inventory picks are easy to work with and a good way to processing shipments. The biggest downside with inventory picks in my mind is that you are only processing one order at a time (although making a modification that will combine sales orders going to the same destination into a single inventory pick is not that hard to accomplish).
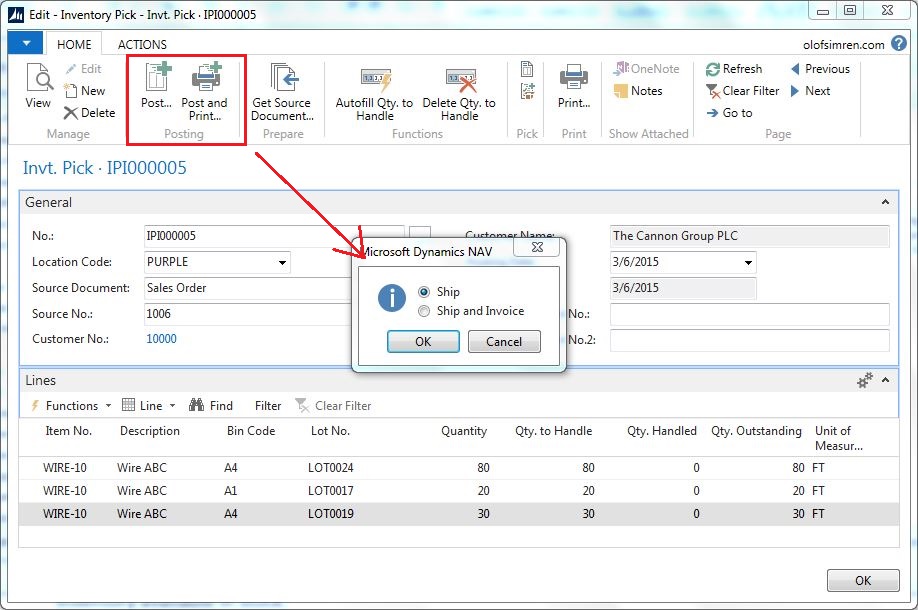
Posting the inventory pick then posts the related order lines. Post and print will print the packing slip to go with the items.
Option 3: Shipping from Warehouse Shipment
The third option in Dynamics NAV is to ship using warehouse shipments. Unlike the inventory picks you can combine multiple order lines on a warehouse shipment and it can be created in advance without having the inventory available in stock.
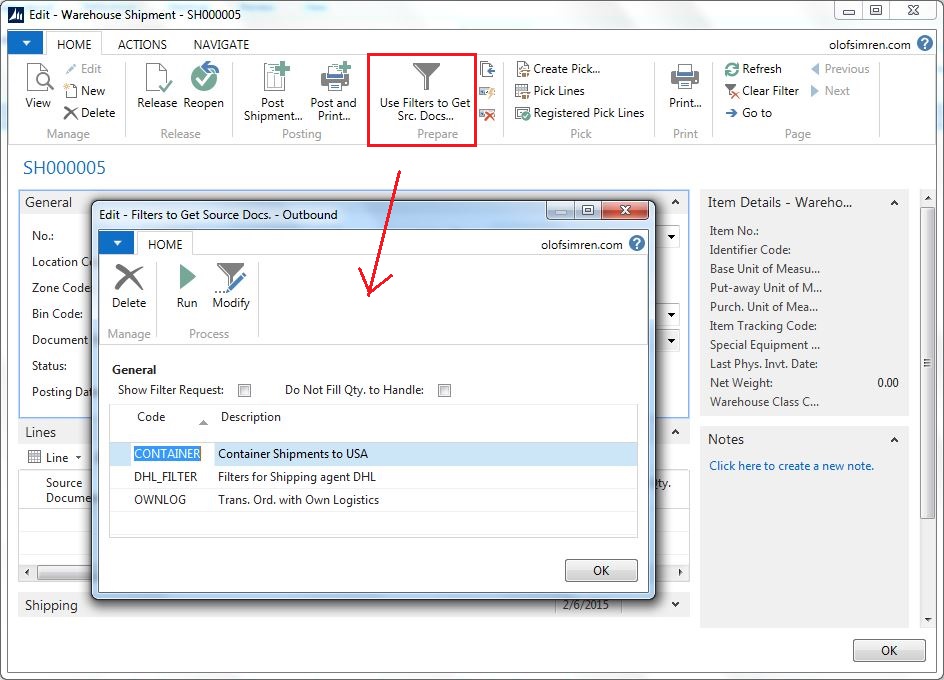
A warehouse shipment is supposed to represent something like a container shipment or a FedEx truck that arrives once a day and picks up multiple packages. Such a shipment can then be prepared in advance using a warehouse shipment. The function ‘use filters to get source documents’ where conditions like the shipping agent, shipment method, etc. can be predefined is typically used to combine order lines that are going to be shipped together this way.
The warehouse shipment then becomes a document for the warehouse employees to use to gather the items and preparing them for when the container or FedEx truck arrives, at which everything on the warehouse shipment should be processed.
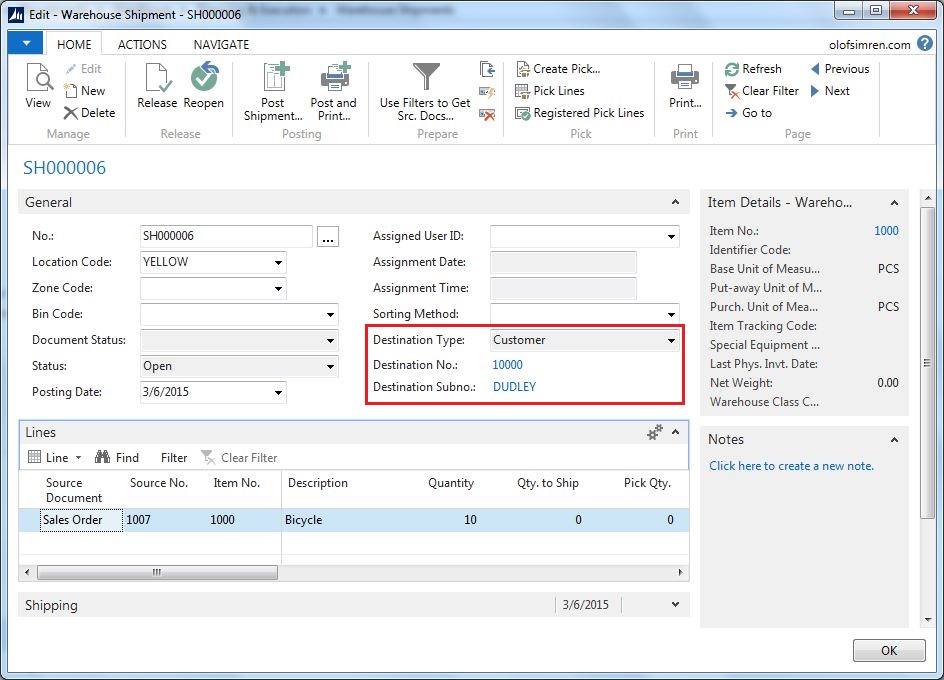
Warehouse shipments are also very common to use to represent a single order or a couple of orders that are being delivered to the same destination and therefor combined into a single shipment. When this is done you typically want to add the destination information (e.g. customer number, ship-to code, etc..) to the header of the warehouse shipment (kind of simulating an inventory pick). This requires a minor modification to the system but is probably one of the most common modifications to Dynamics NAV. The reason for wanting to add this to the header is to make sure there is an easy way to find the warehouse shipment since it with this method has the potential to have many warehouse shipments open at the same time. Another reason to do this is to program something that would prevent a user to mix order lines going to different destinations on a single warehouse shipment. This modification could look like below;
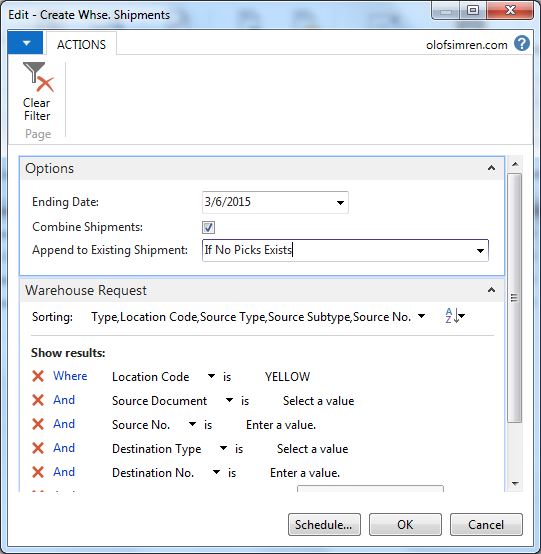
Many years ago I also developed a batch job that goes through all released order lines within a date filter and combines then into individual warehouse shipments based on the destination and shipping agent. This has over the years turned into a very useful way of applying the warehouse shipment functionality (especially if you have order lines that are going to ship at different dates). This solution might be something that I will publish in the downloads section here on my blog in the future. The batch job looks something like below where you set the horizon for shipments using and ending date and the criteria to combine orders into single warehouse shipments.
Without a feature like this the warehouse shipments need to be created manually, either in the warehouse shipment page or from each individual order using the create warehouse shipment functions.
The warehouse shipment lines have a one to one relationship with the order lines and you can only ship from one bin at a time per line. If you have a floating inventory with the same items in multiple bins you then need to gather them in one bin before making the shipment.
On warehouse shipments the lot and serial numbers are entered in the item tracking lines page (everyone’s favorite 🙂 ) related to the line (you don’t have then directly on the lines like you have on the inventory picks).
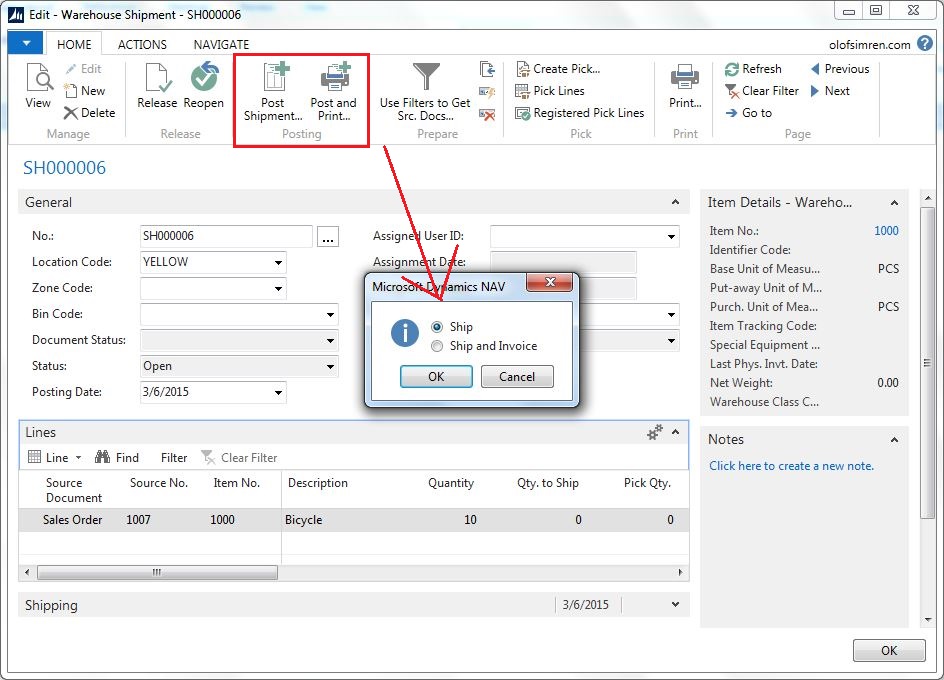
Posting a warehouse shipment then posts the related order lines. Post and print will give you the packing slip to go with the shipment (you get one packing slip per order).
Option 4: Shipping from Warehouse Shipment using Warehouse Picks
The forth option could be seen as a combination between option 2 and 3. You have the warehouse shipments to be created just like with option 3 and in addition to this you use a warehouse pick created based on the warehouse shipment(s) to pick the items and gather them in a shipping area before they gets posted as shipped. This option works both with and without the ‘directed put-away and pick’ functionality (also sometimes referred to as advanced warehousing or WMS).
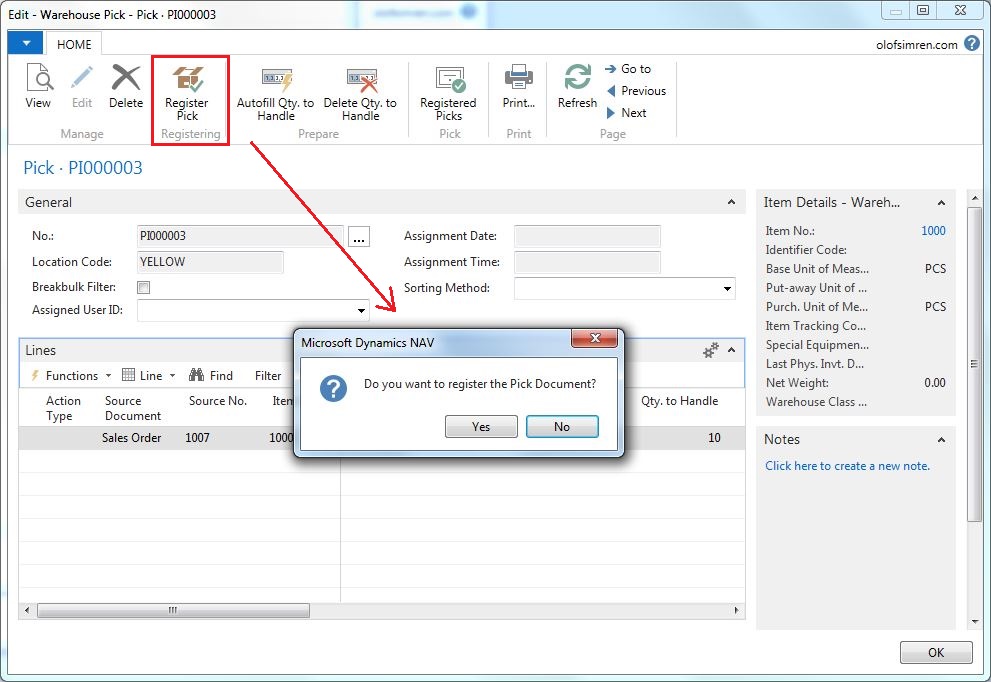
Registering the warehouse pick moves the items between the bins and updates the warehouse shipment lines as picked. Posting the warehouse shipment then posts the related order lines.
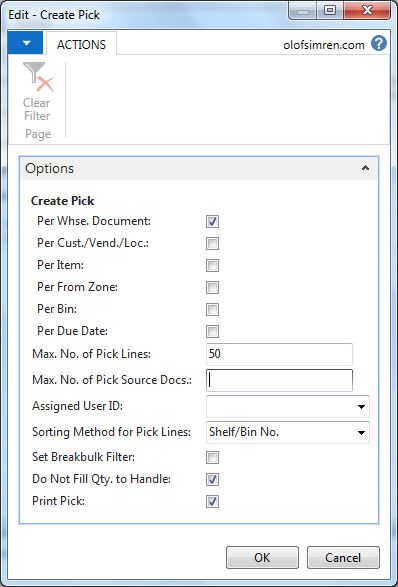
The real power of this method is that you can have multiple warehouse picks for a warehouse shipment which in turn can contain multiple orders and therefor optimize the picking process (for example by picking same items cross multiple orders or picking based on zones). The warehouse picks can be created directly from a warehouse shipment or through the pick worksheet. Below are some of the options that you have during the creation of warehouse picks from the pick worksheet.
Just like the inventory picks, a warehouse pick is only created for items that are available to pick. A warehouse pick is ‘registered’ not ‘posted’, it only moves the items from their bins to the shipping area and no ledger entries are created (nothing in the g/l or item ledger, only some warehouse entries to record the move between bins).
Posting the warehouse shipment then posts the related orders as shipped. Doing a post and print will print the packing slip at the same time. Same as previously described in option 3.
The downside with this option is obviously the number steps that has to be performed to process a shipment. This is especially painful when undoing shipments or making changes to orders where the warehouse shipments and picks has been created. If you don’t see the benefits of combining orders and optimizing picks this way then I would recommend one of the other options for processing shipments.
Note that the way to process shipments is something that you define per location and it is therefore something that can be different for different locations within the same company in Dynamics NAV.

58 Comments
Leave your reply.